
Today we are sharing one of the new kits available TODAY in the Stampin’ Up Occasions catalog. This project is super fun to put together and is so useful, you may want to make one for yourself and get another to give to your BFF as a gift.
So here’s the skinny: you will need some multipurpose adhesive, such as Tombow, and the following ink pads are suggested by Stampin’ Up:
- Real Red
- Lost Lagoon
- Hello Honey
- Melon Mambo
- Blushing Bride
- Baked Brown Sugar
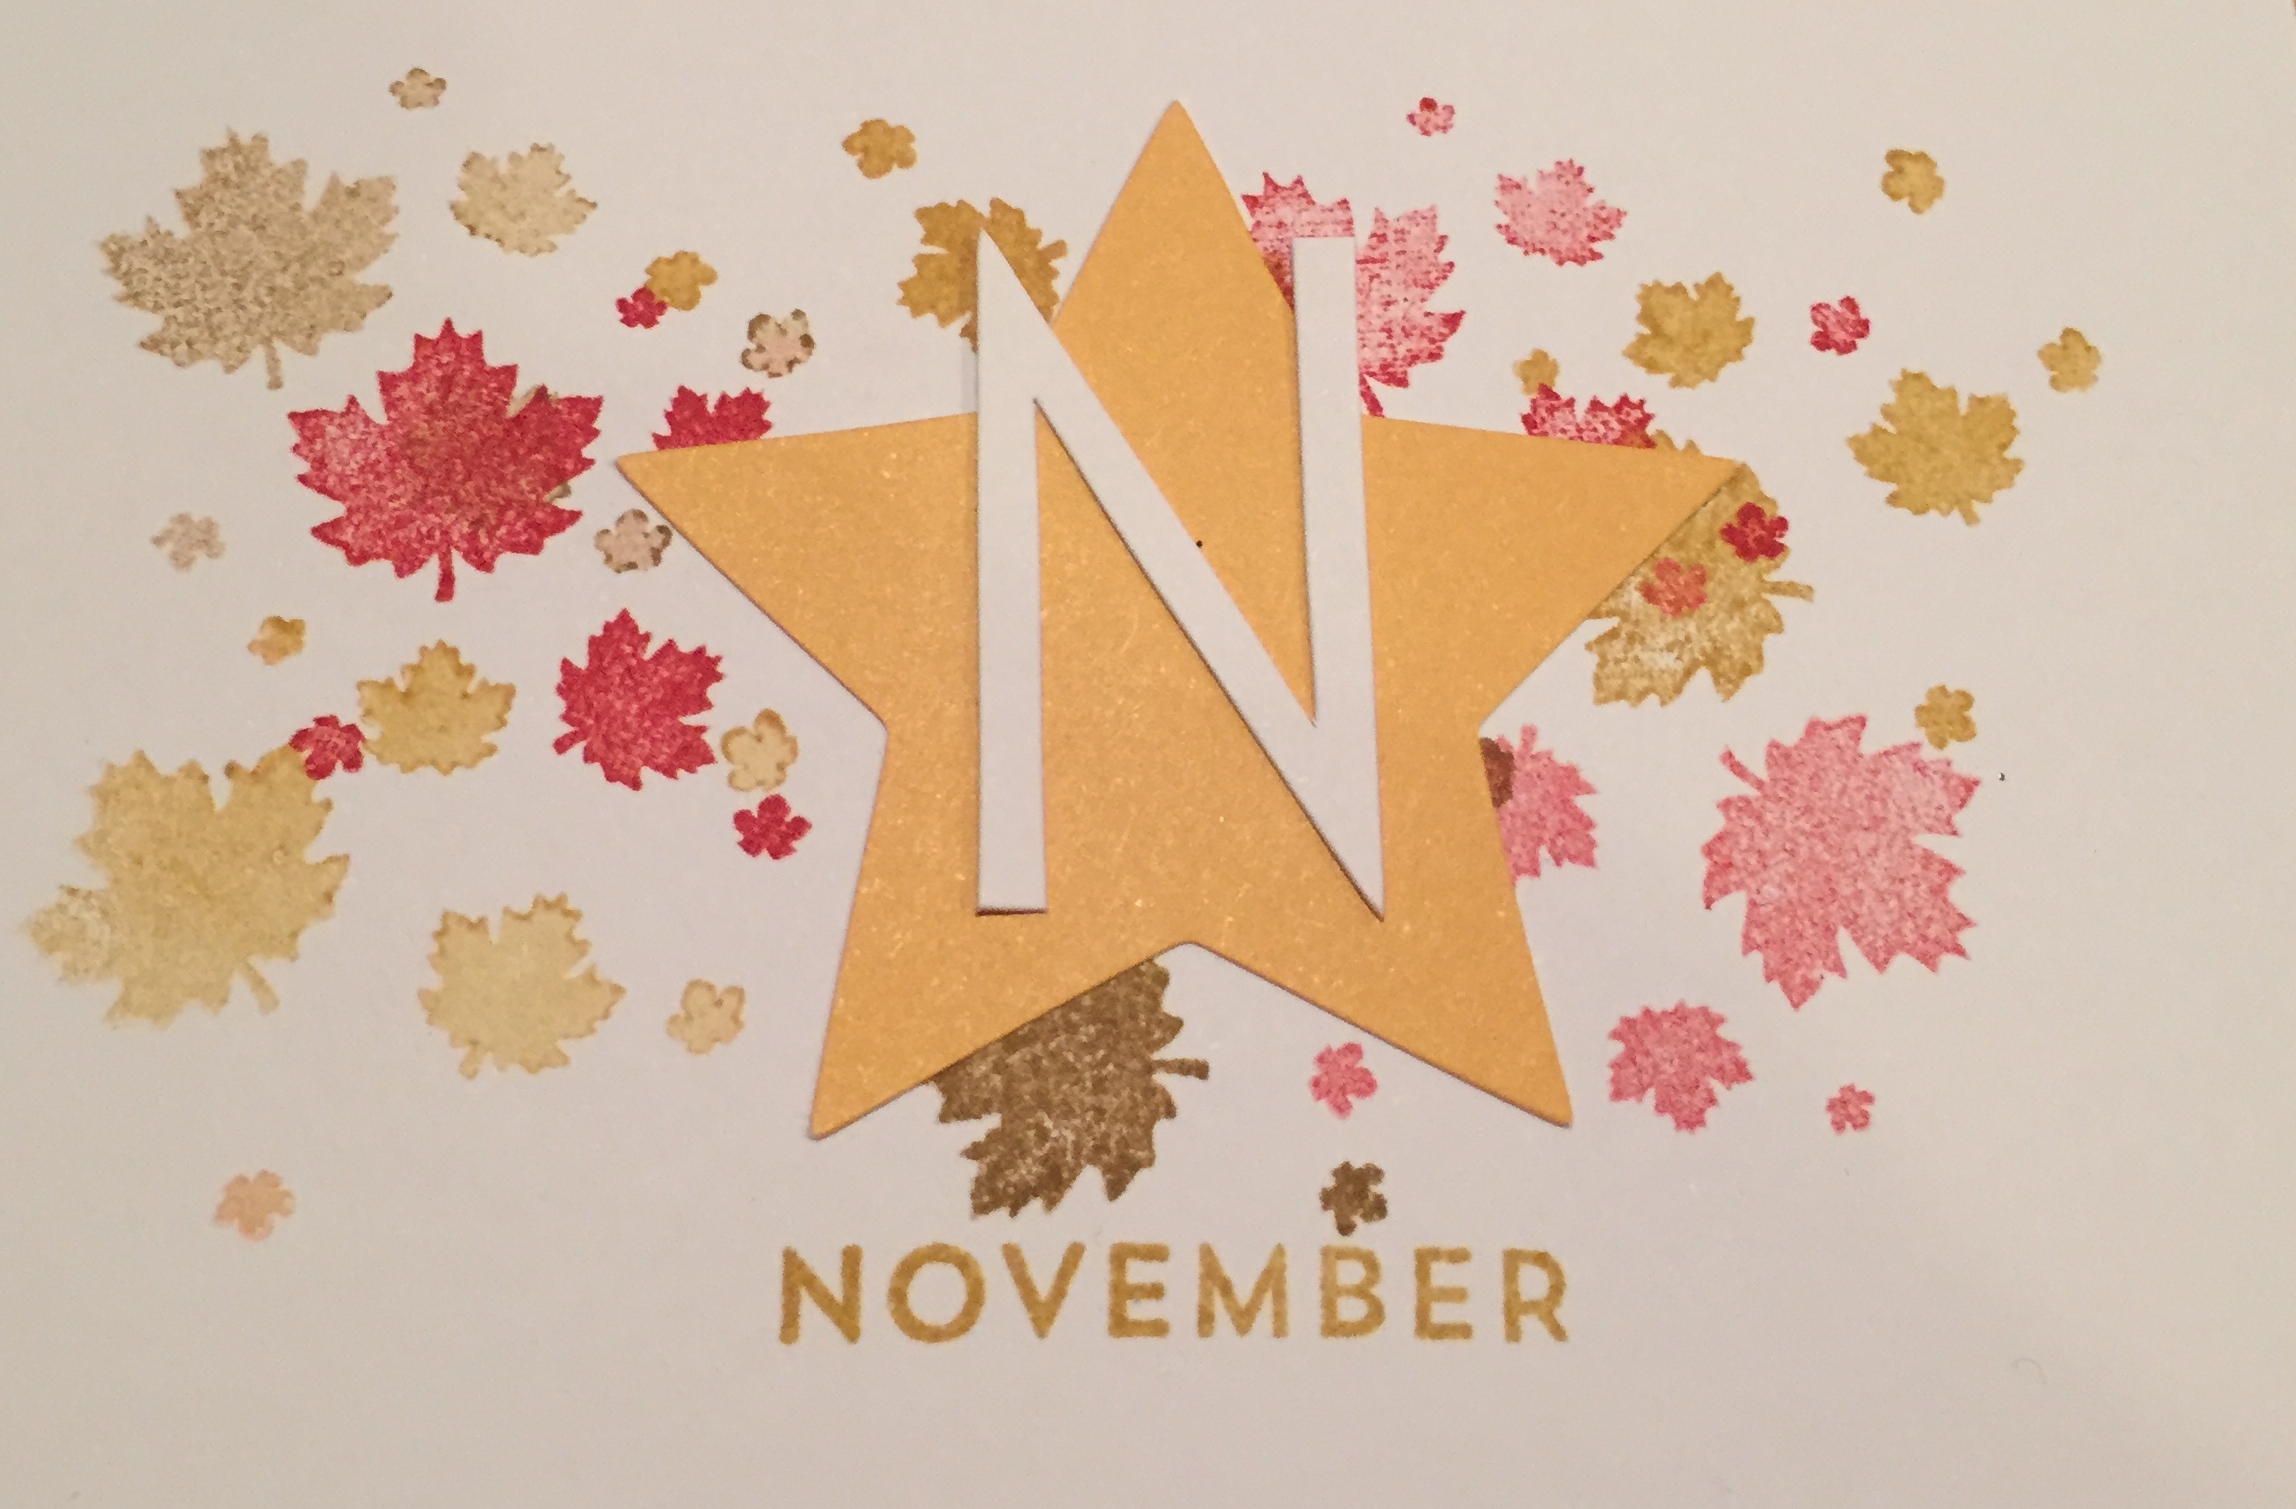
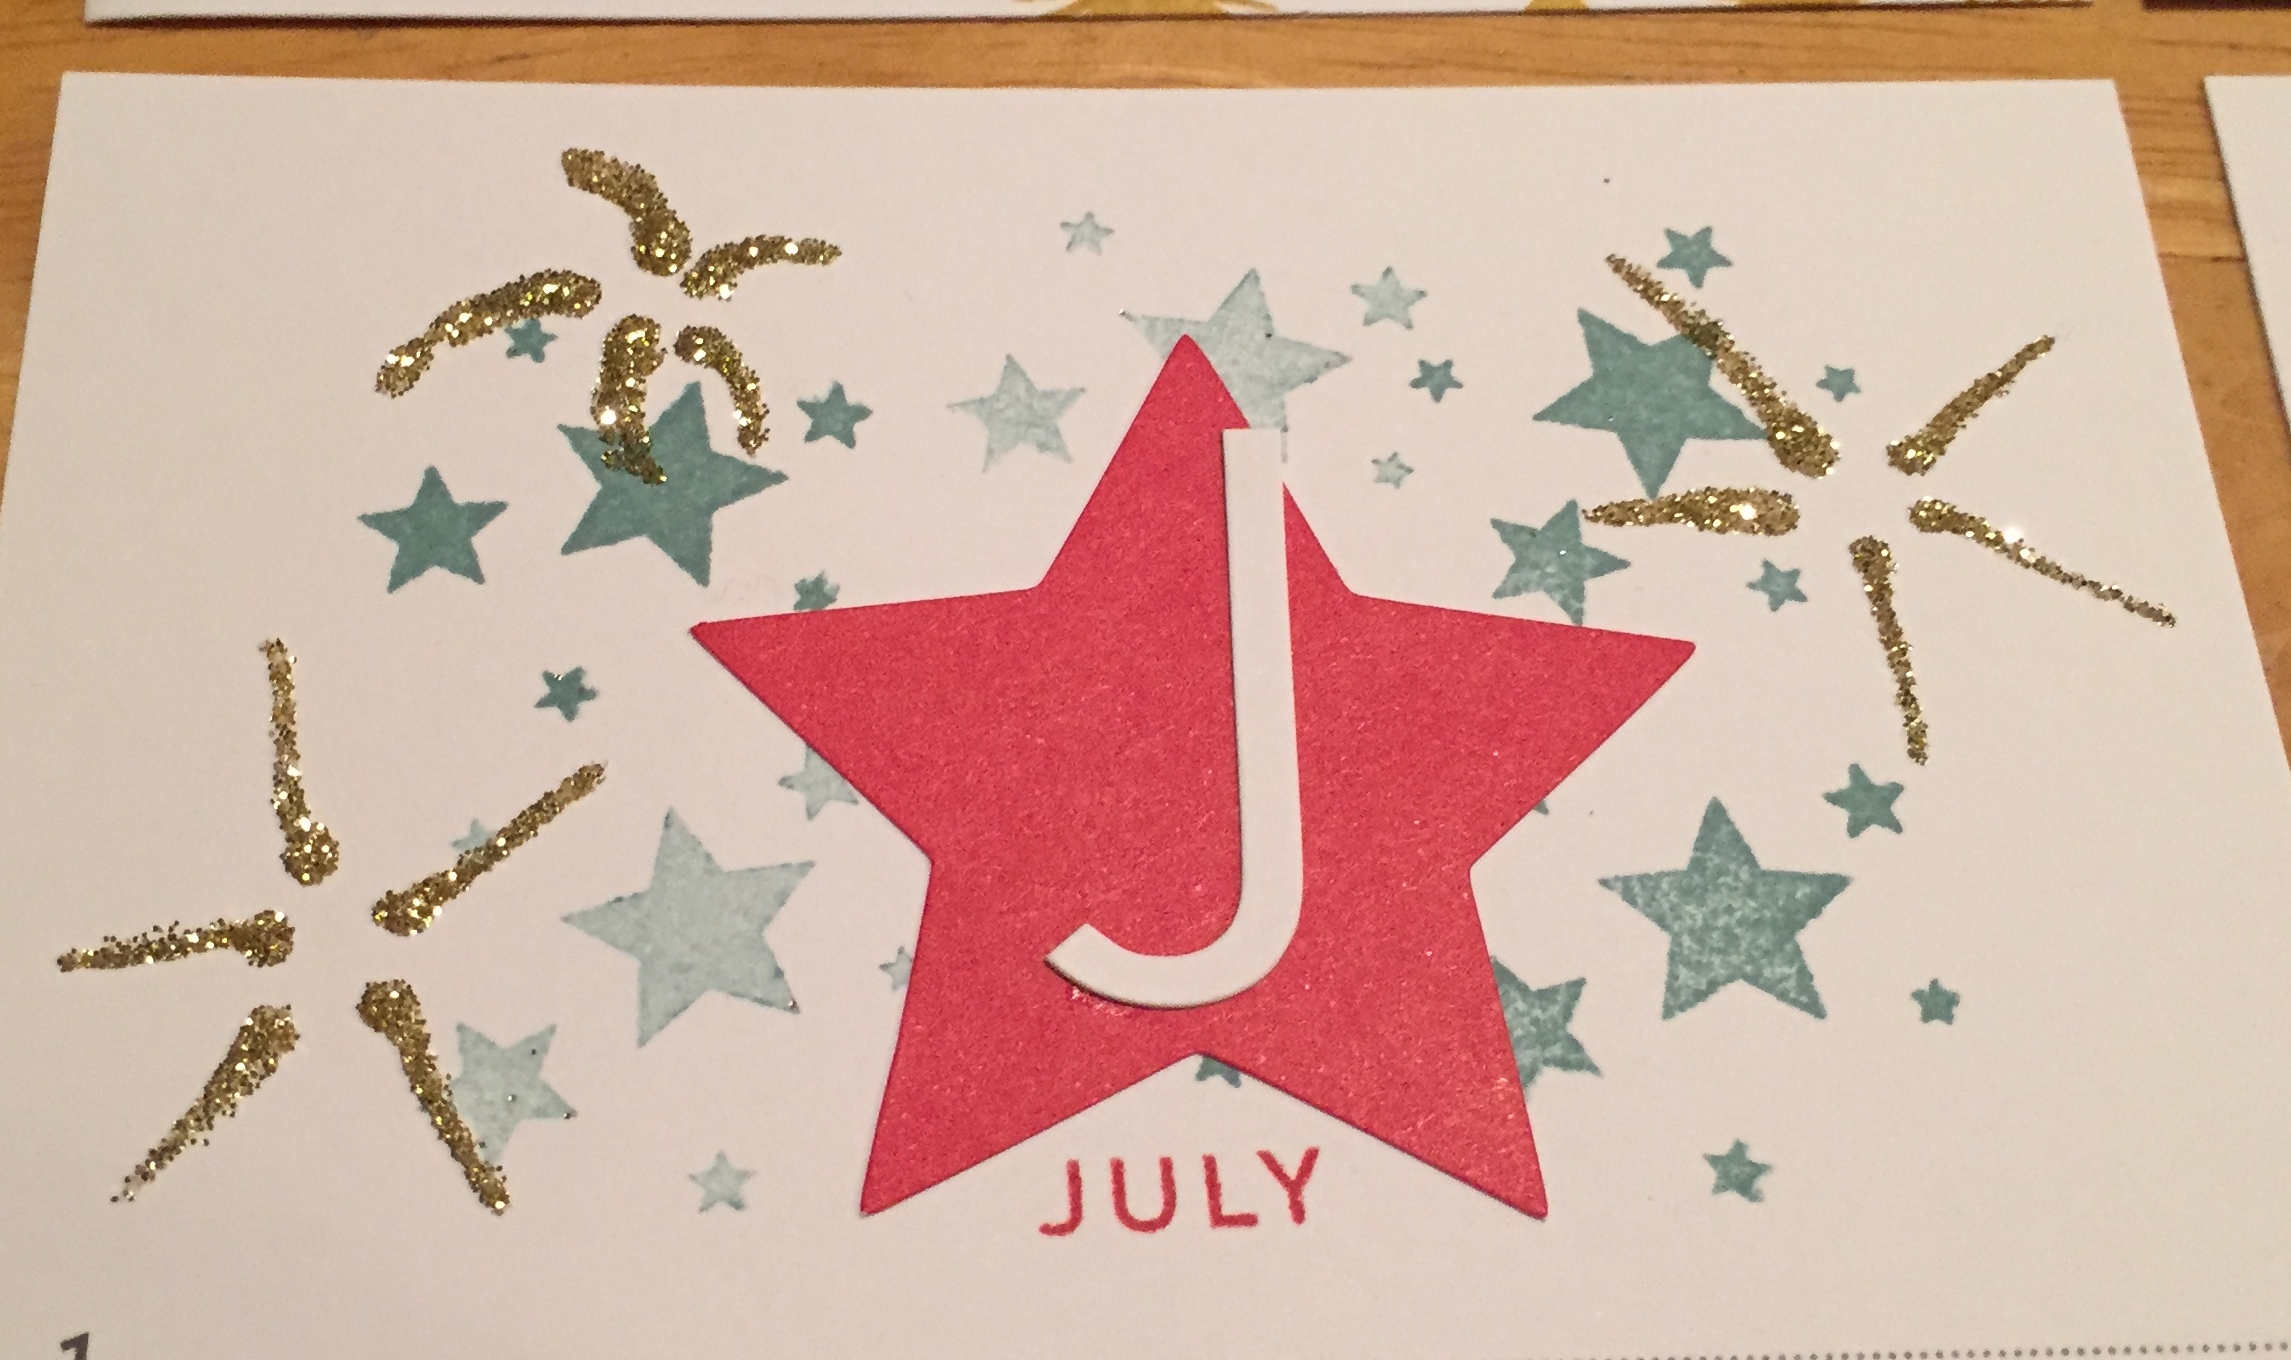
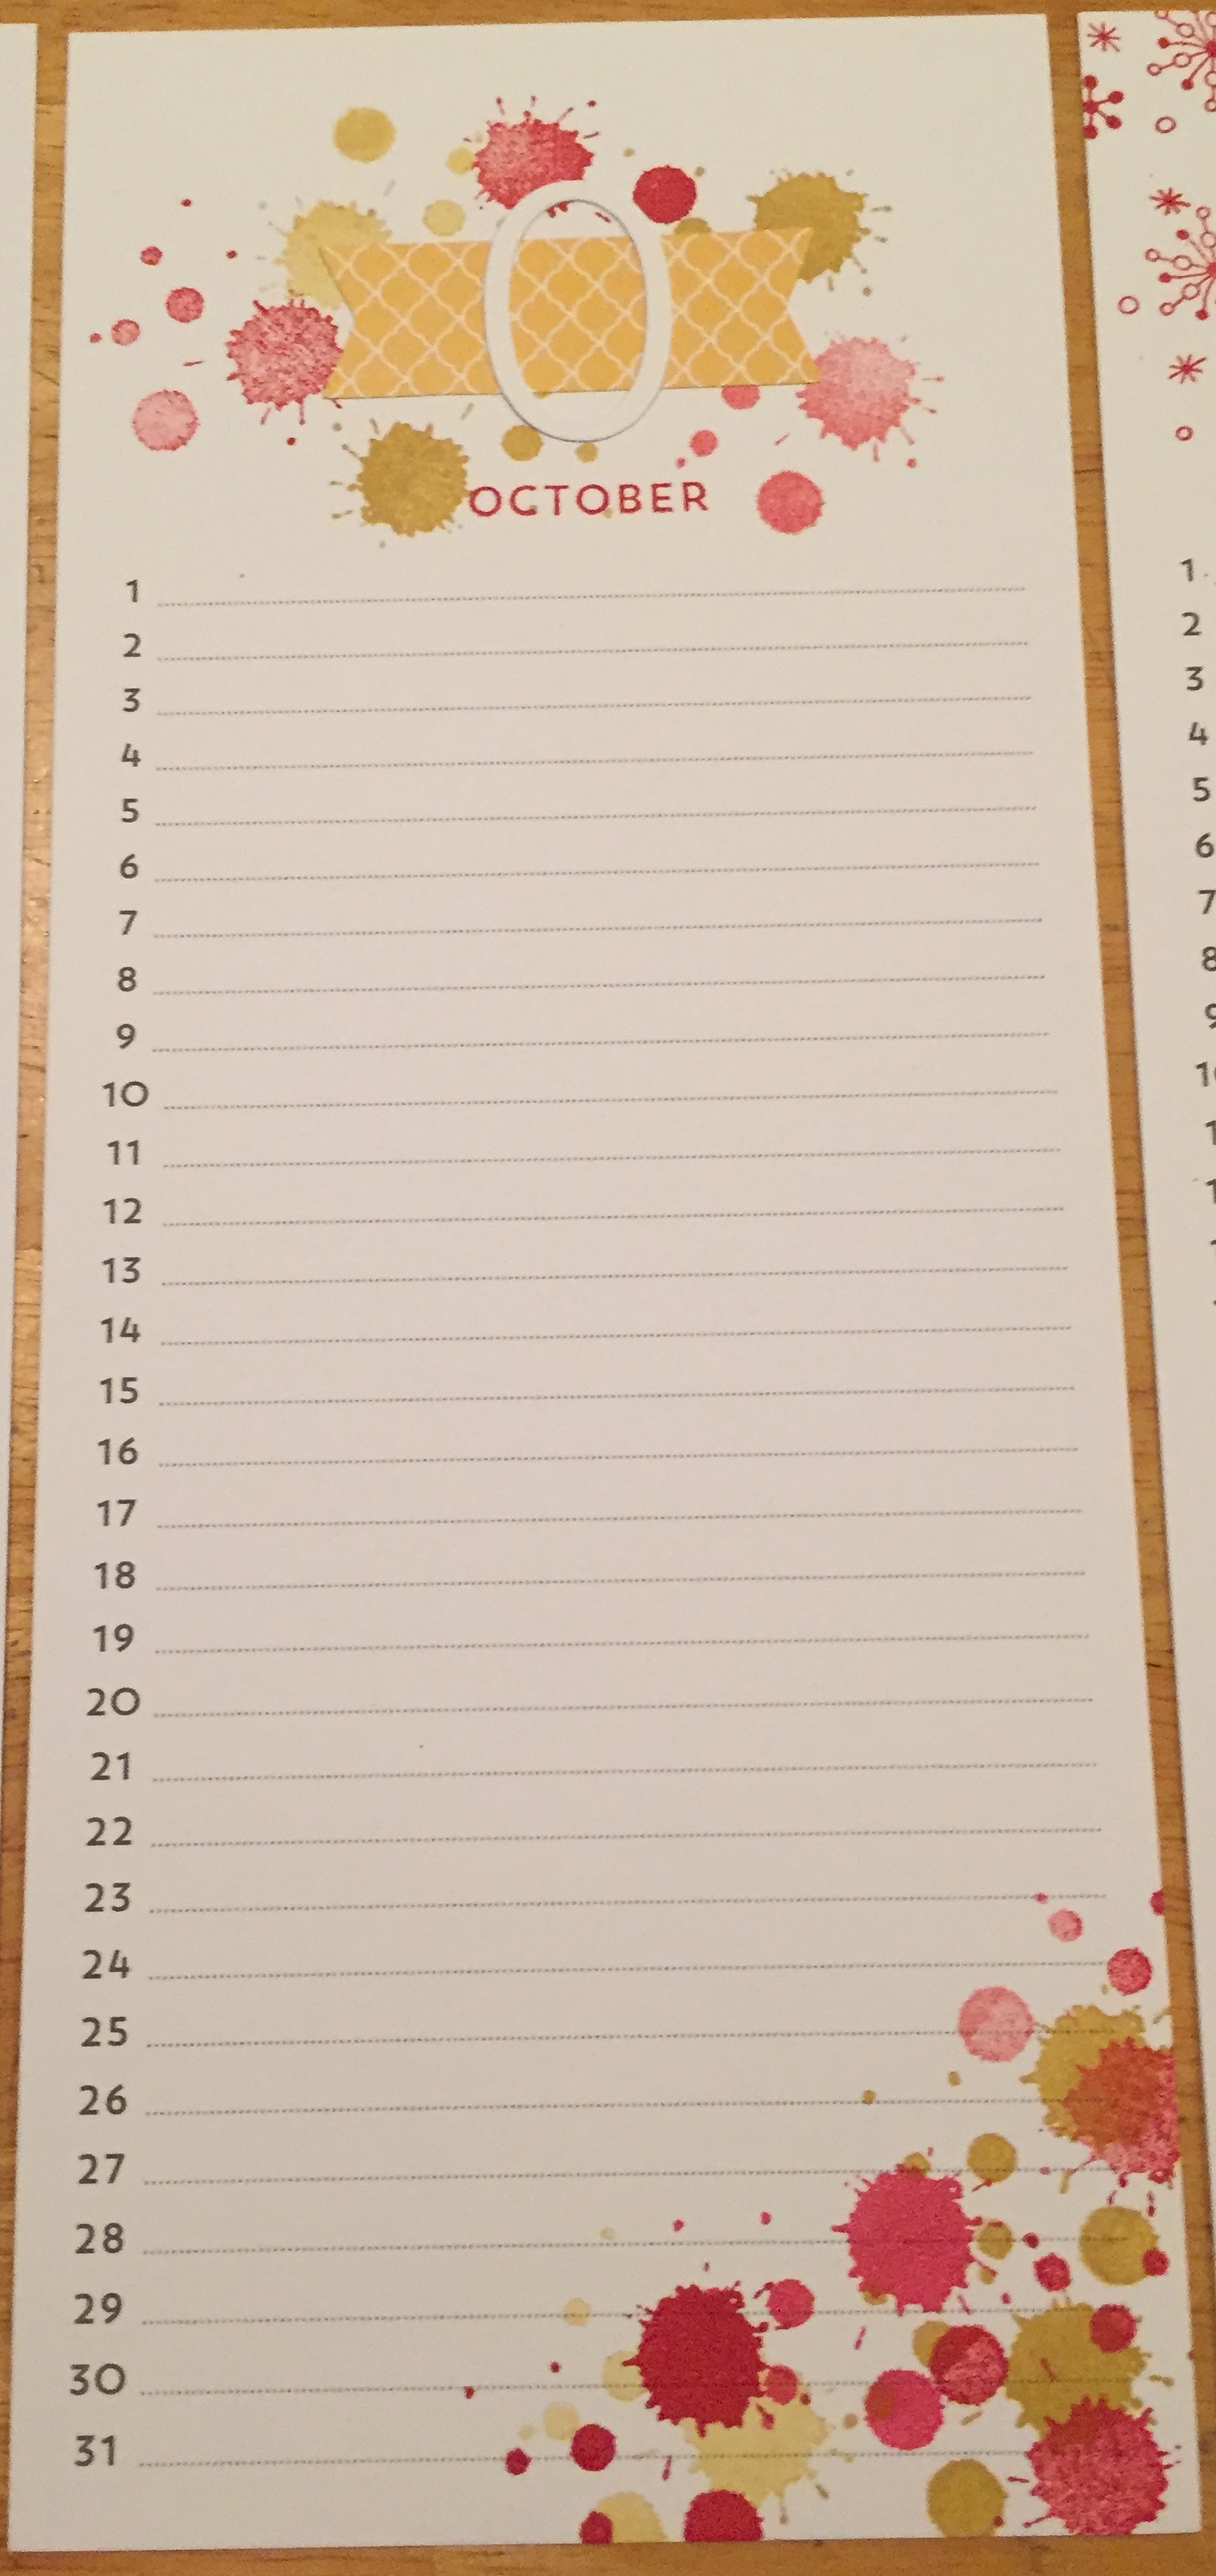
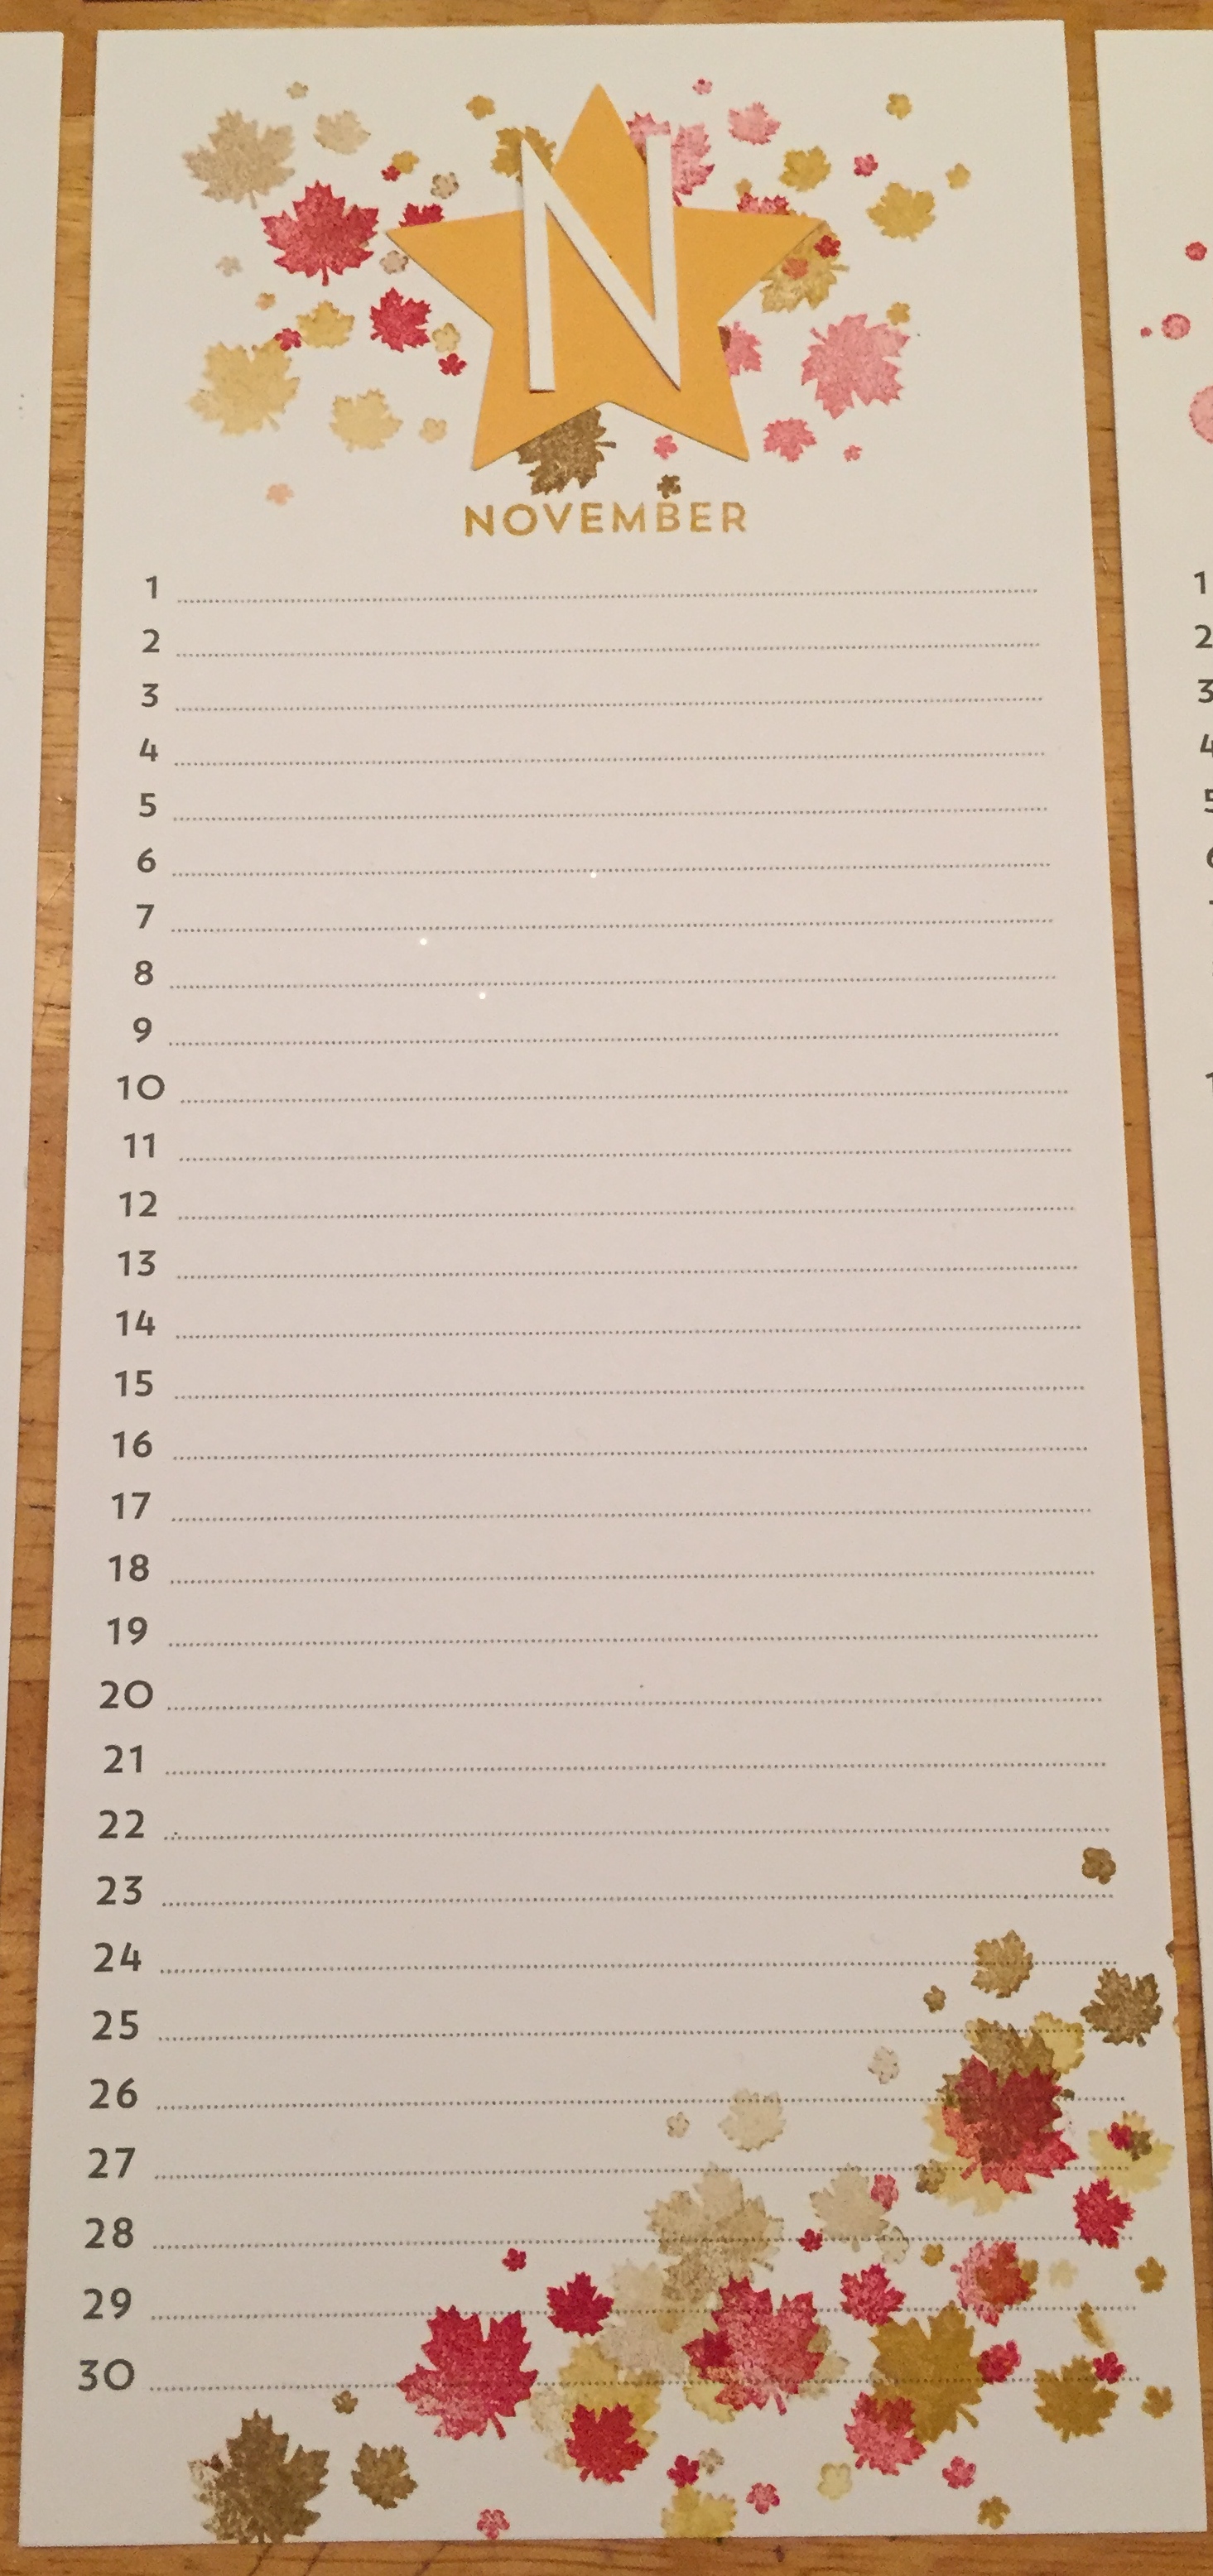
We were working with the instructions, so we stuck to those colors, but we couldn’t help but think that a really great orange, like Pumpkin Pie, would have been nice for the October or November pages.
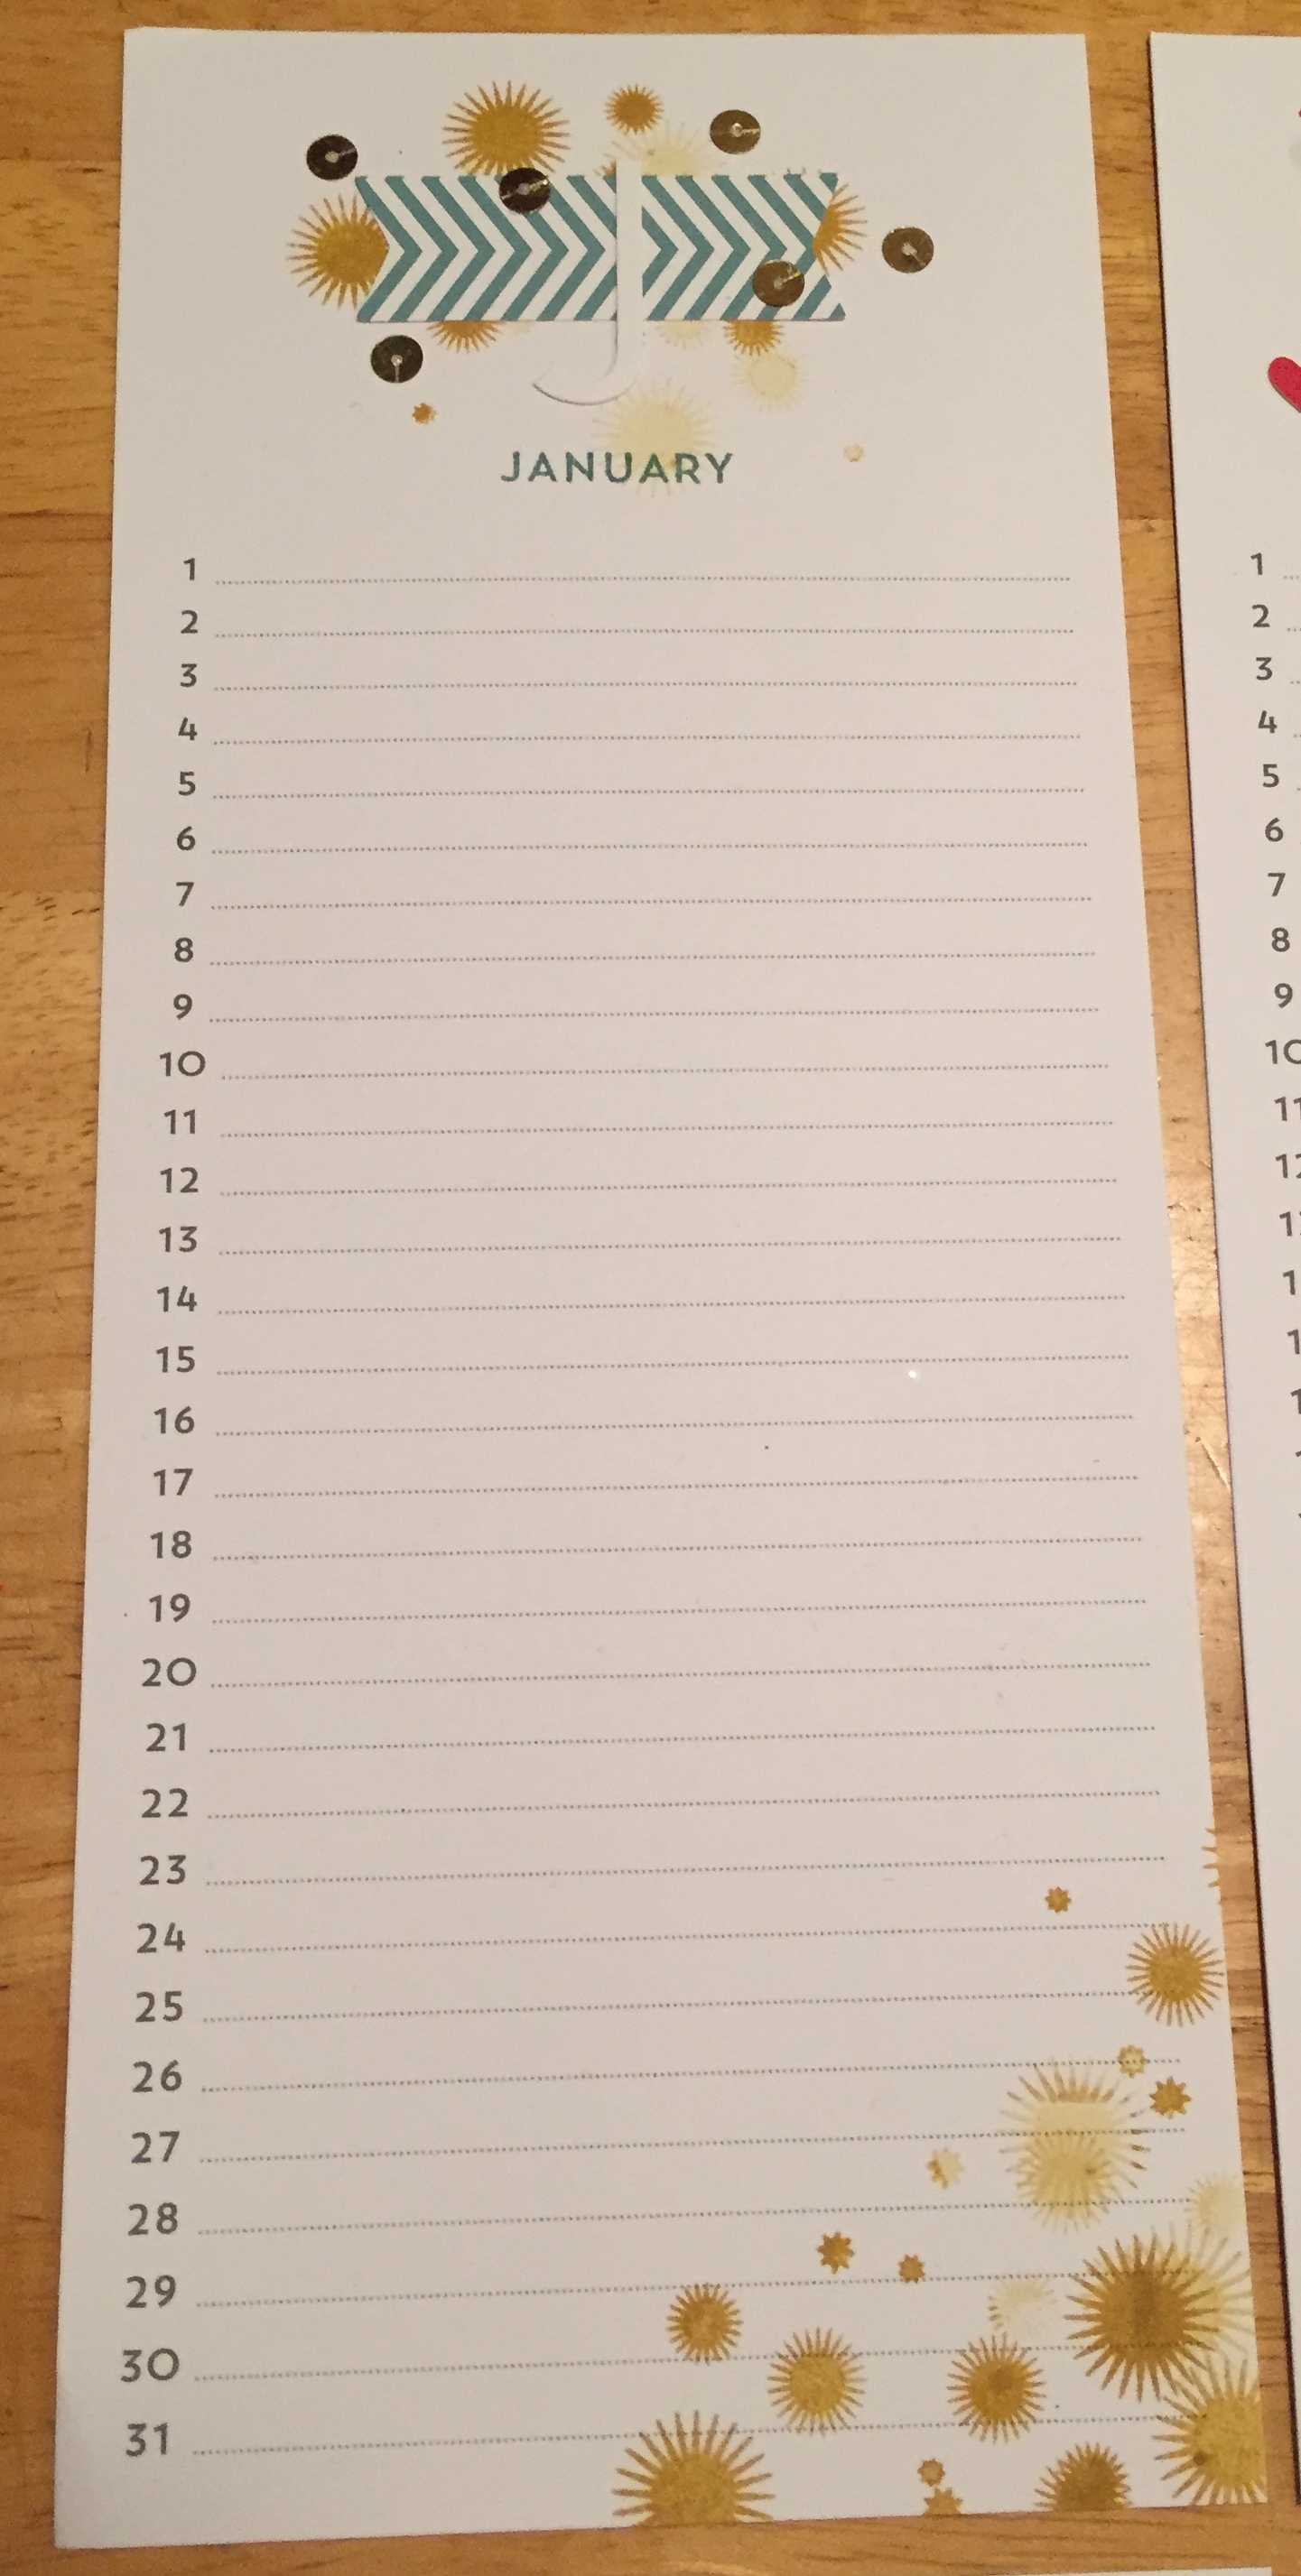
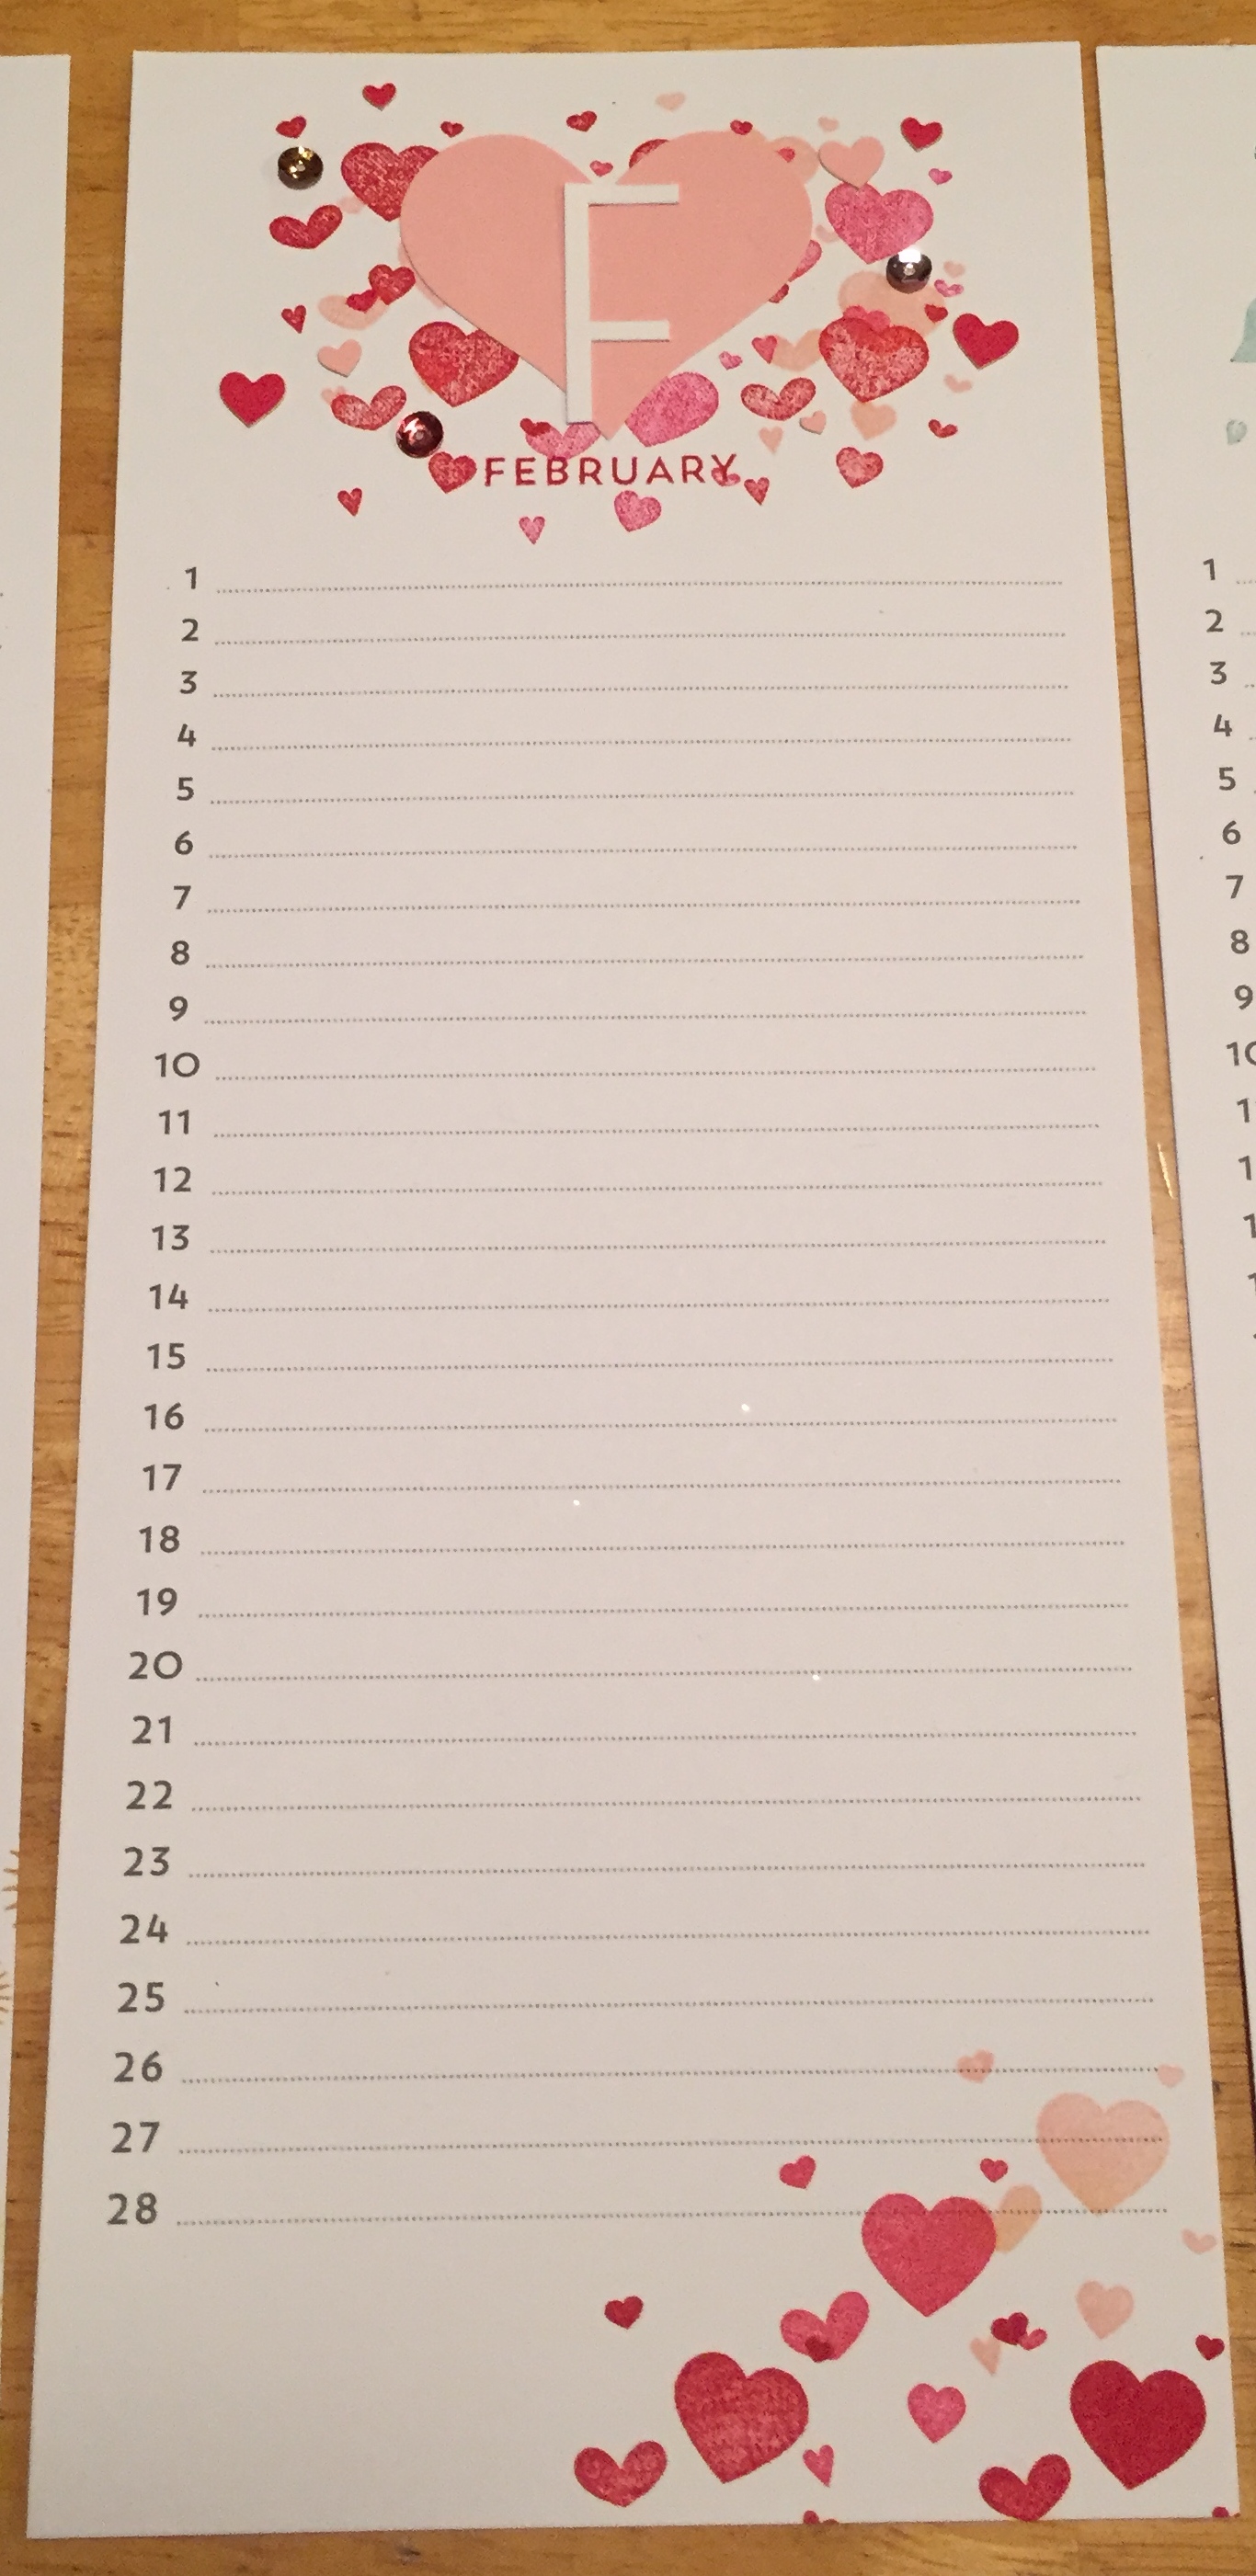
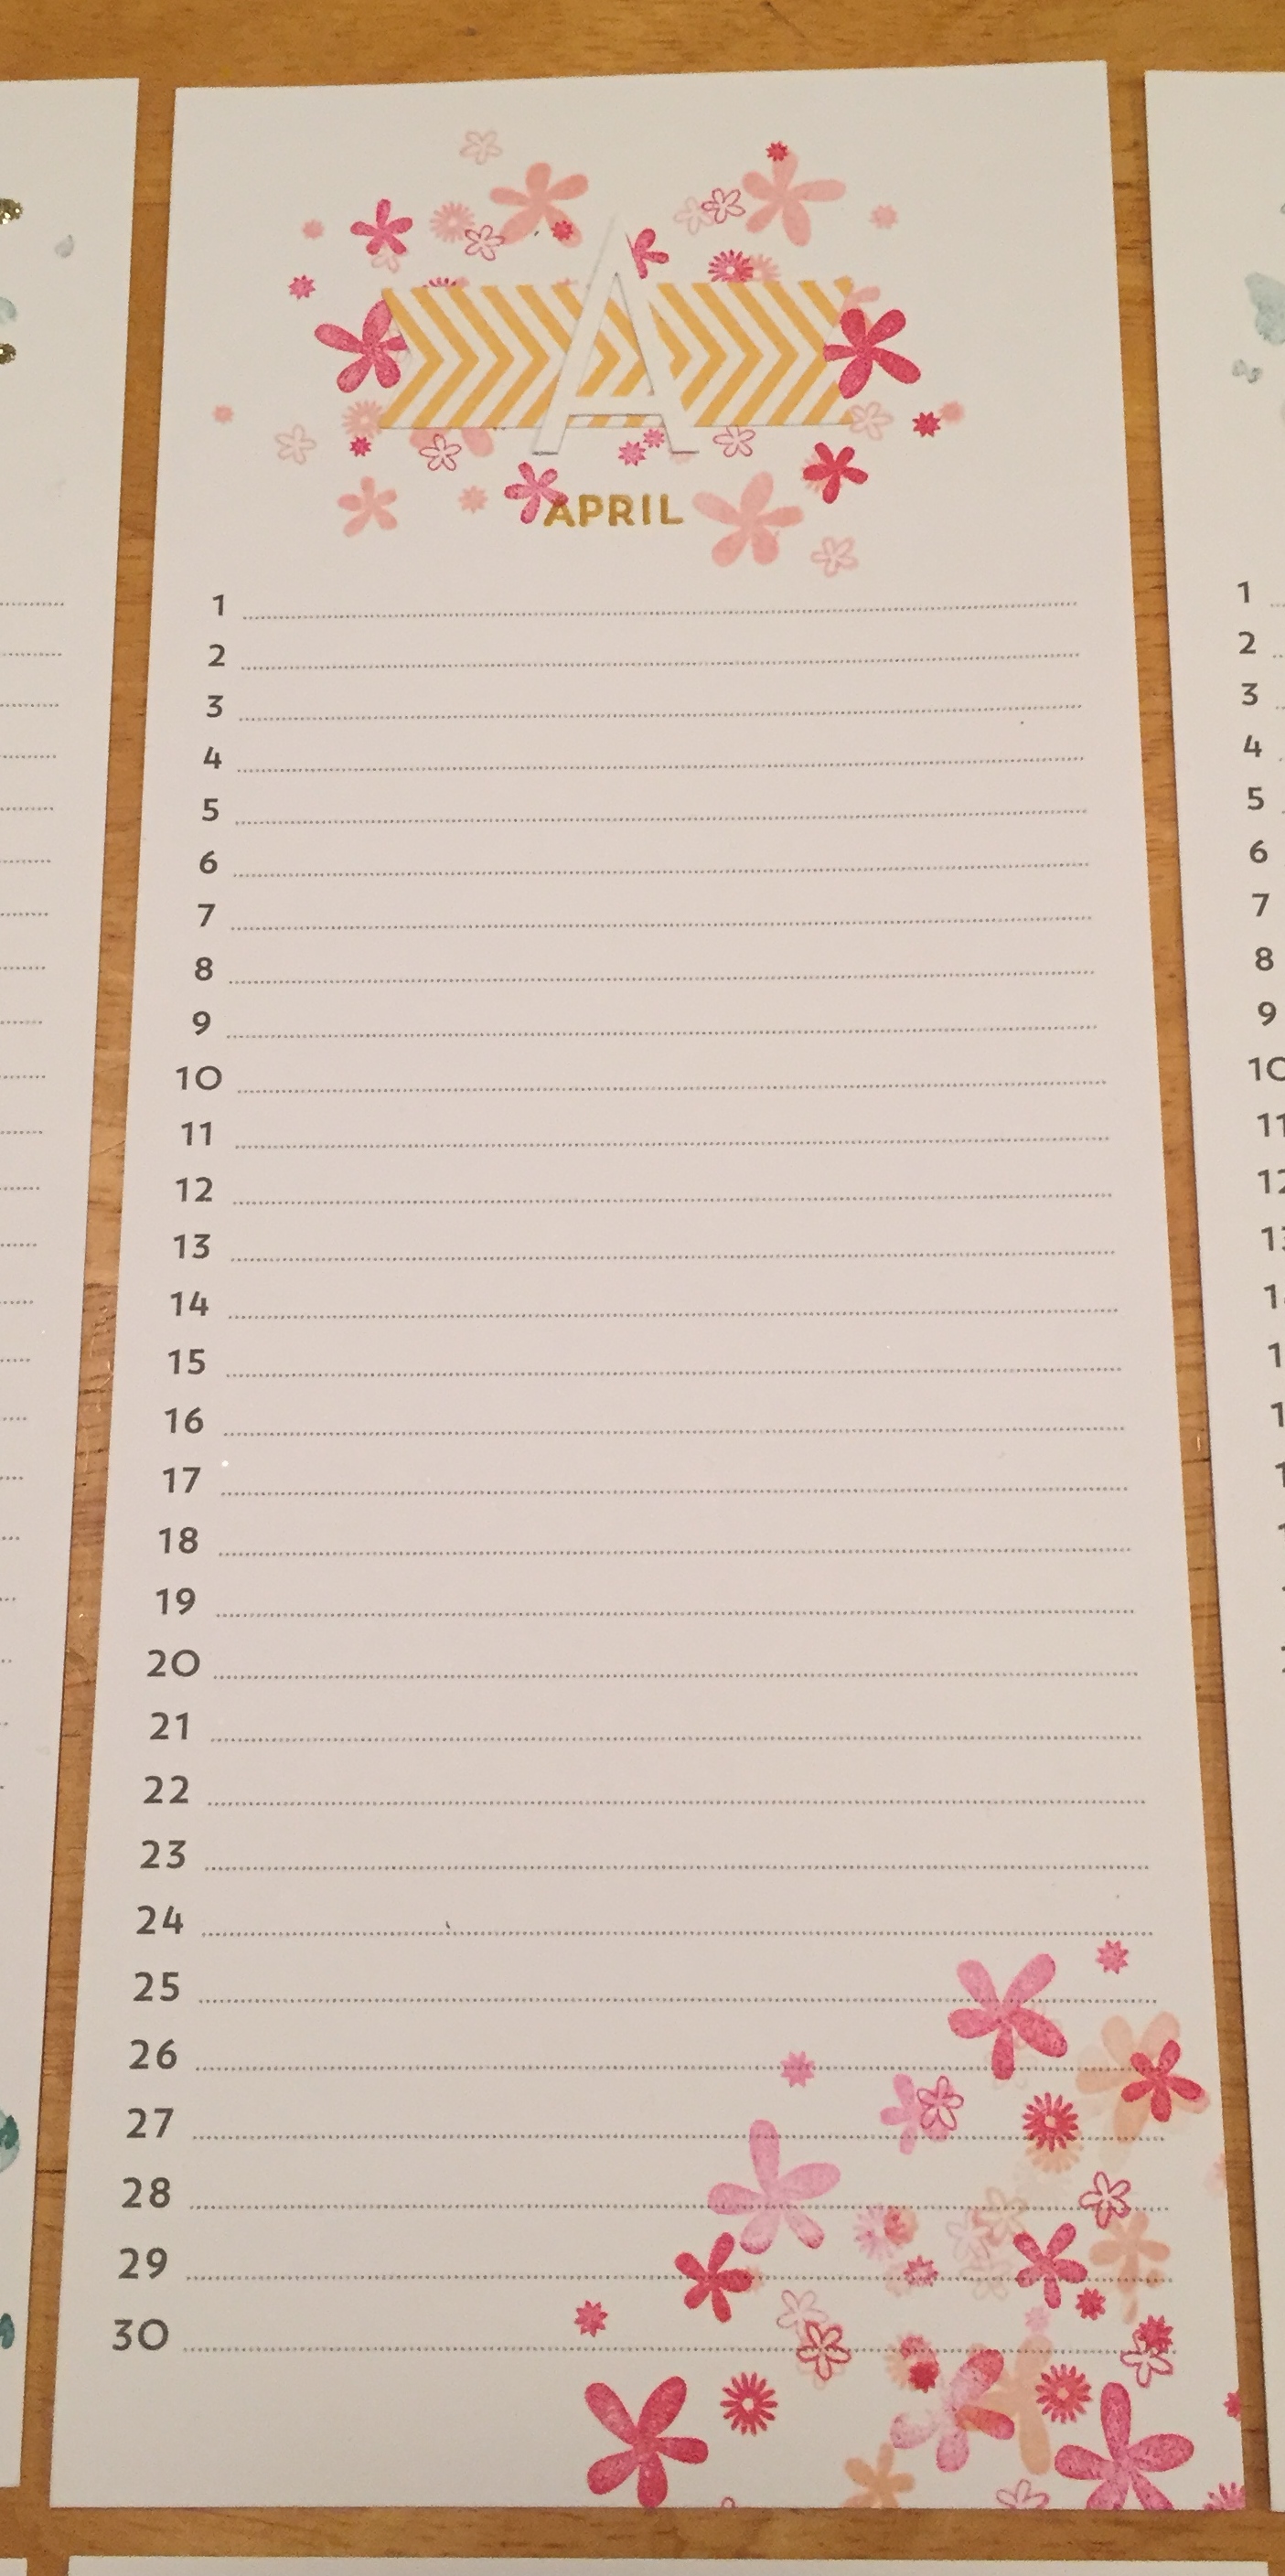
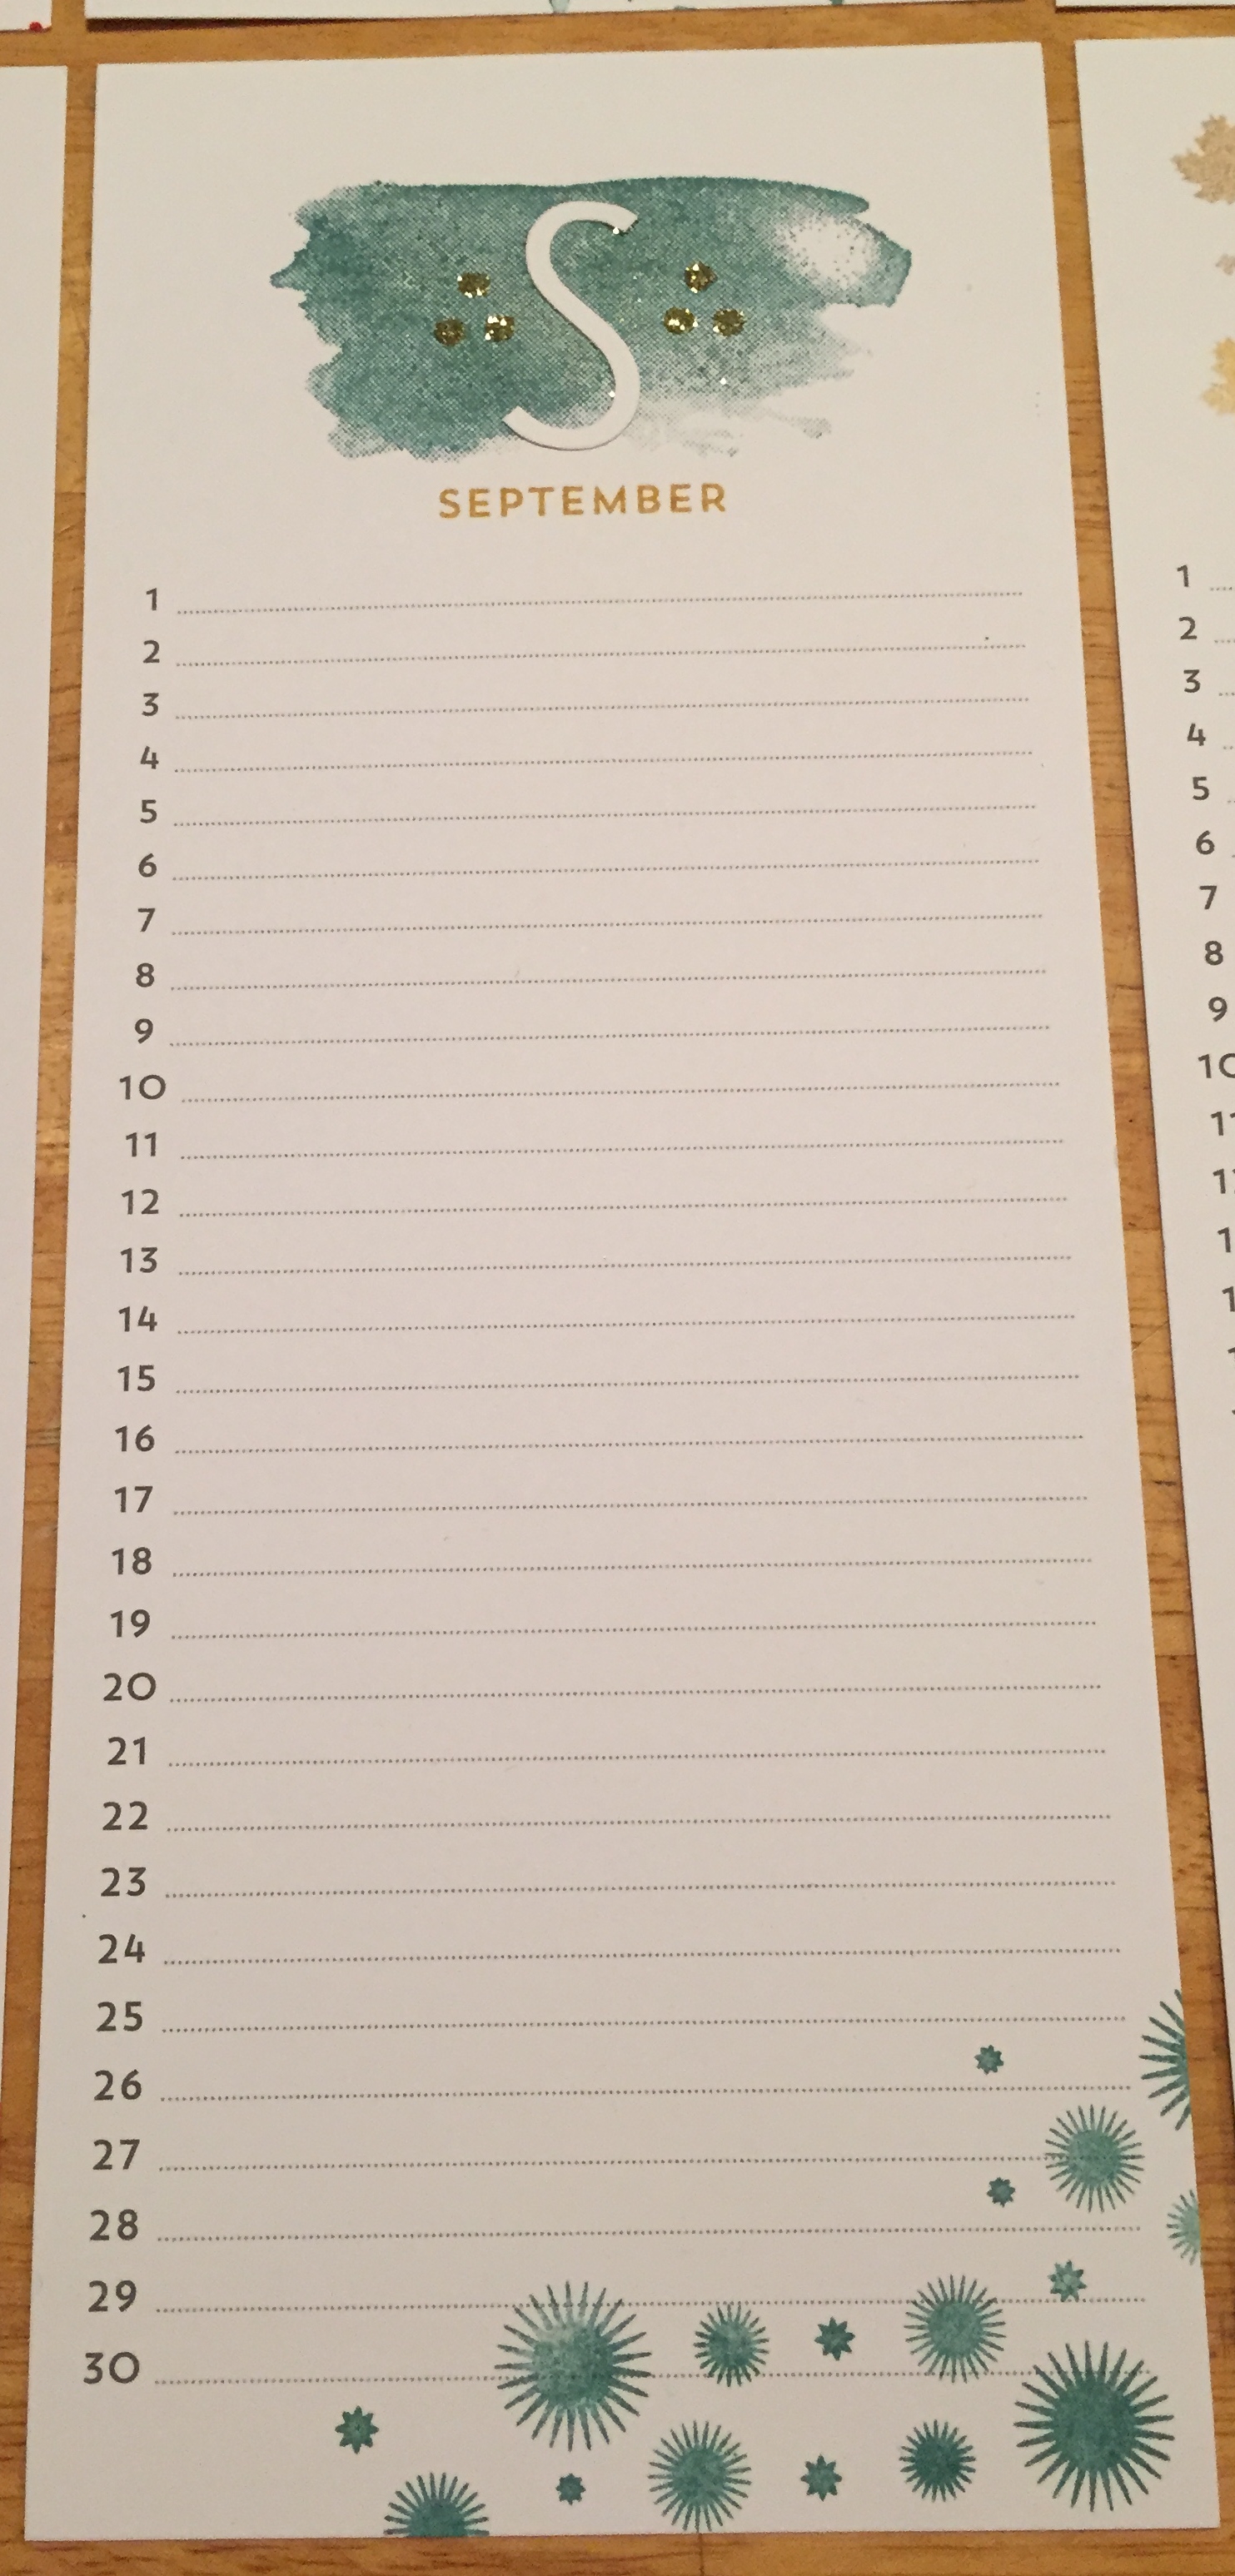
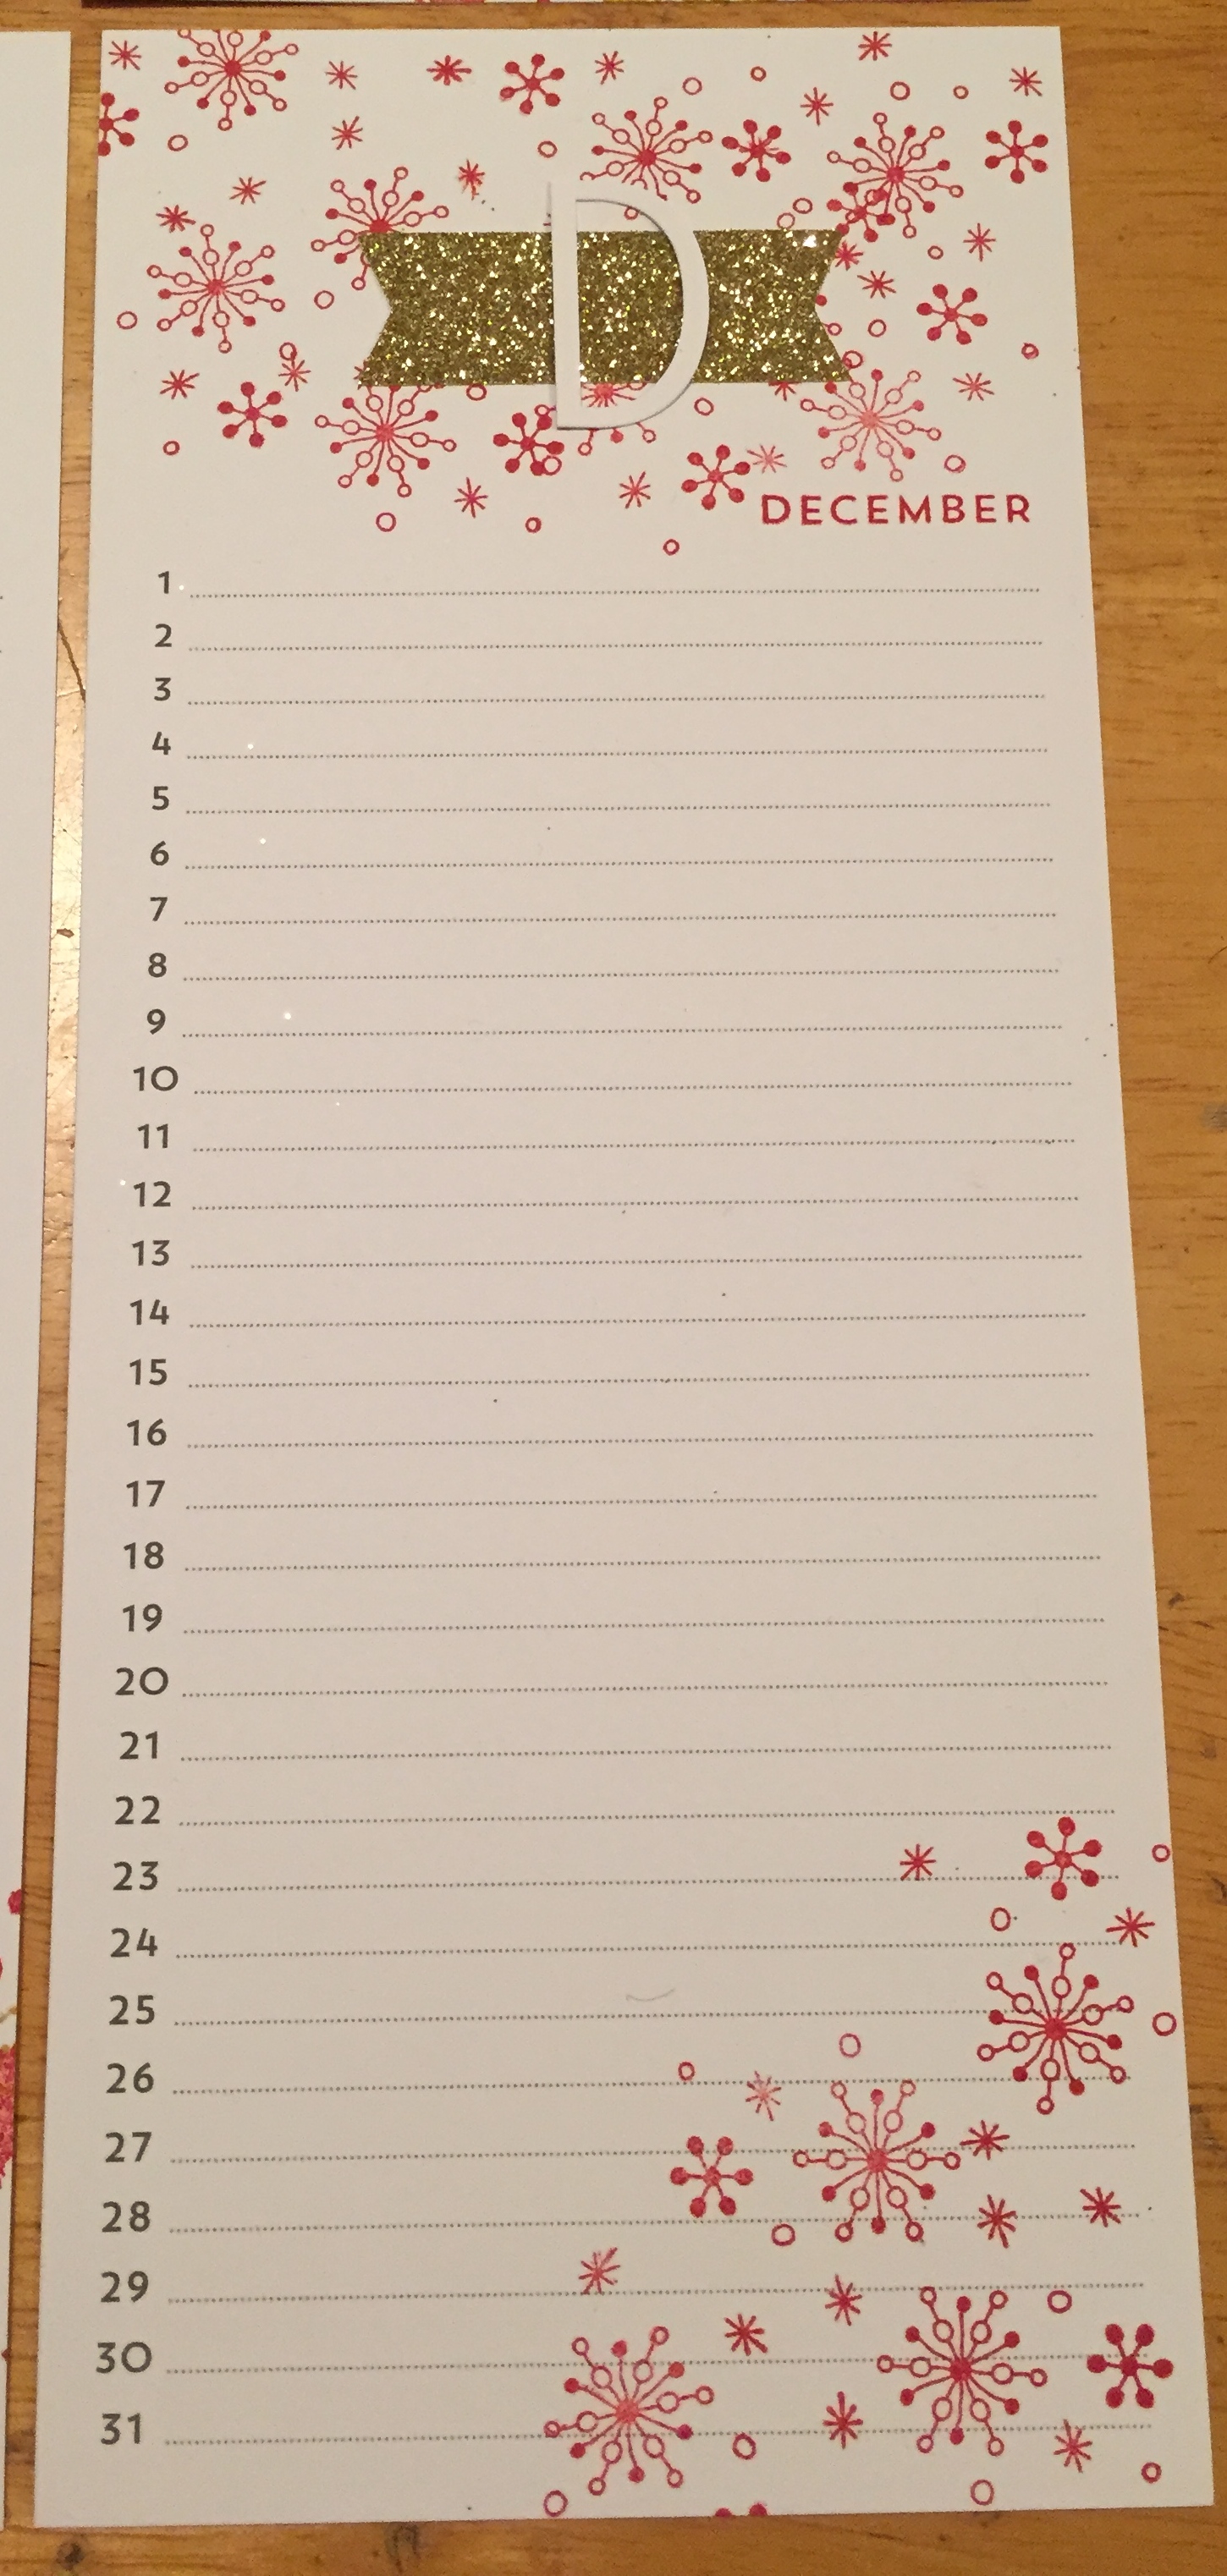
“Thirty days has November…..”: Remember that old children’s poem/chant thingy that helps to keep track of the number of days in each month? Well, you need that chant. Or a calendar to reference. Or you can use the knuckle trick. Anyway, the sheets have different numbers of days, so be sure you are using an appropriate sheet with the proper number of days for the month you are working on.
How’s your vision?: We love everyone at SU!, but, all kidding aside, they must have an outstanding vision plan, because these instructions are printed in some seriously tiny fonts. So we are providing their instructions for us normally-visioned people:
- Before you start, make sure your card has the correct number of lines for the month you want.
- Want to add extra layers of colors? Use the stamping off technique or sponge daubers to add extra color where you want it.
- If you want to give the calendar as a gift, decorate the box with Lost Lagoon 3/8″ satin stitched ribbon and the Perpetual Birthday Calendar Sticker.
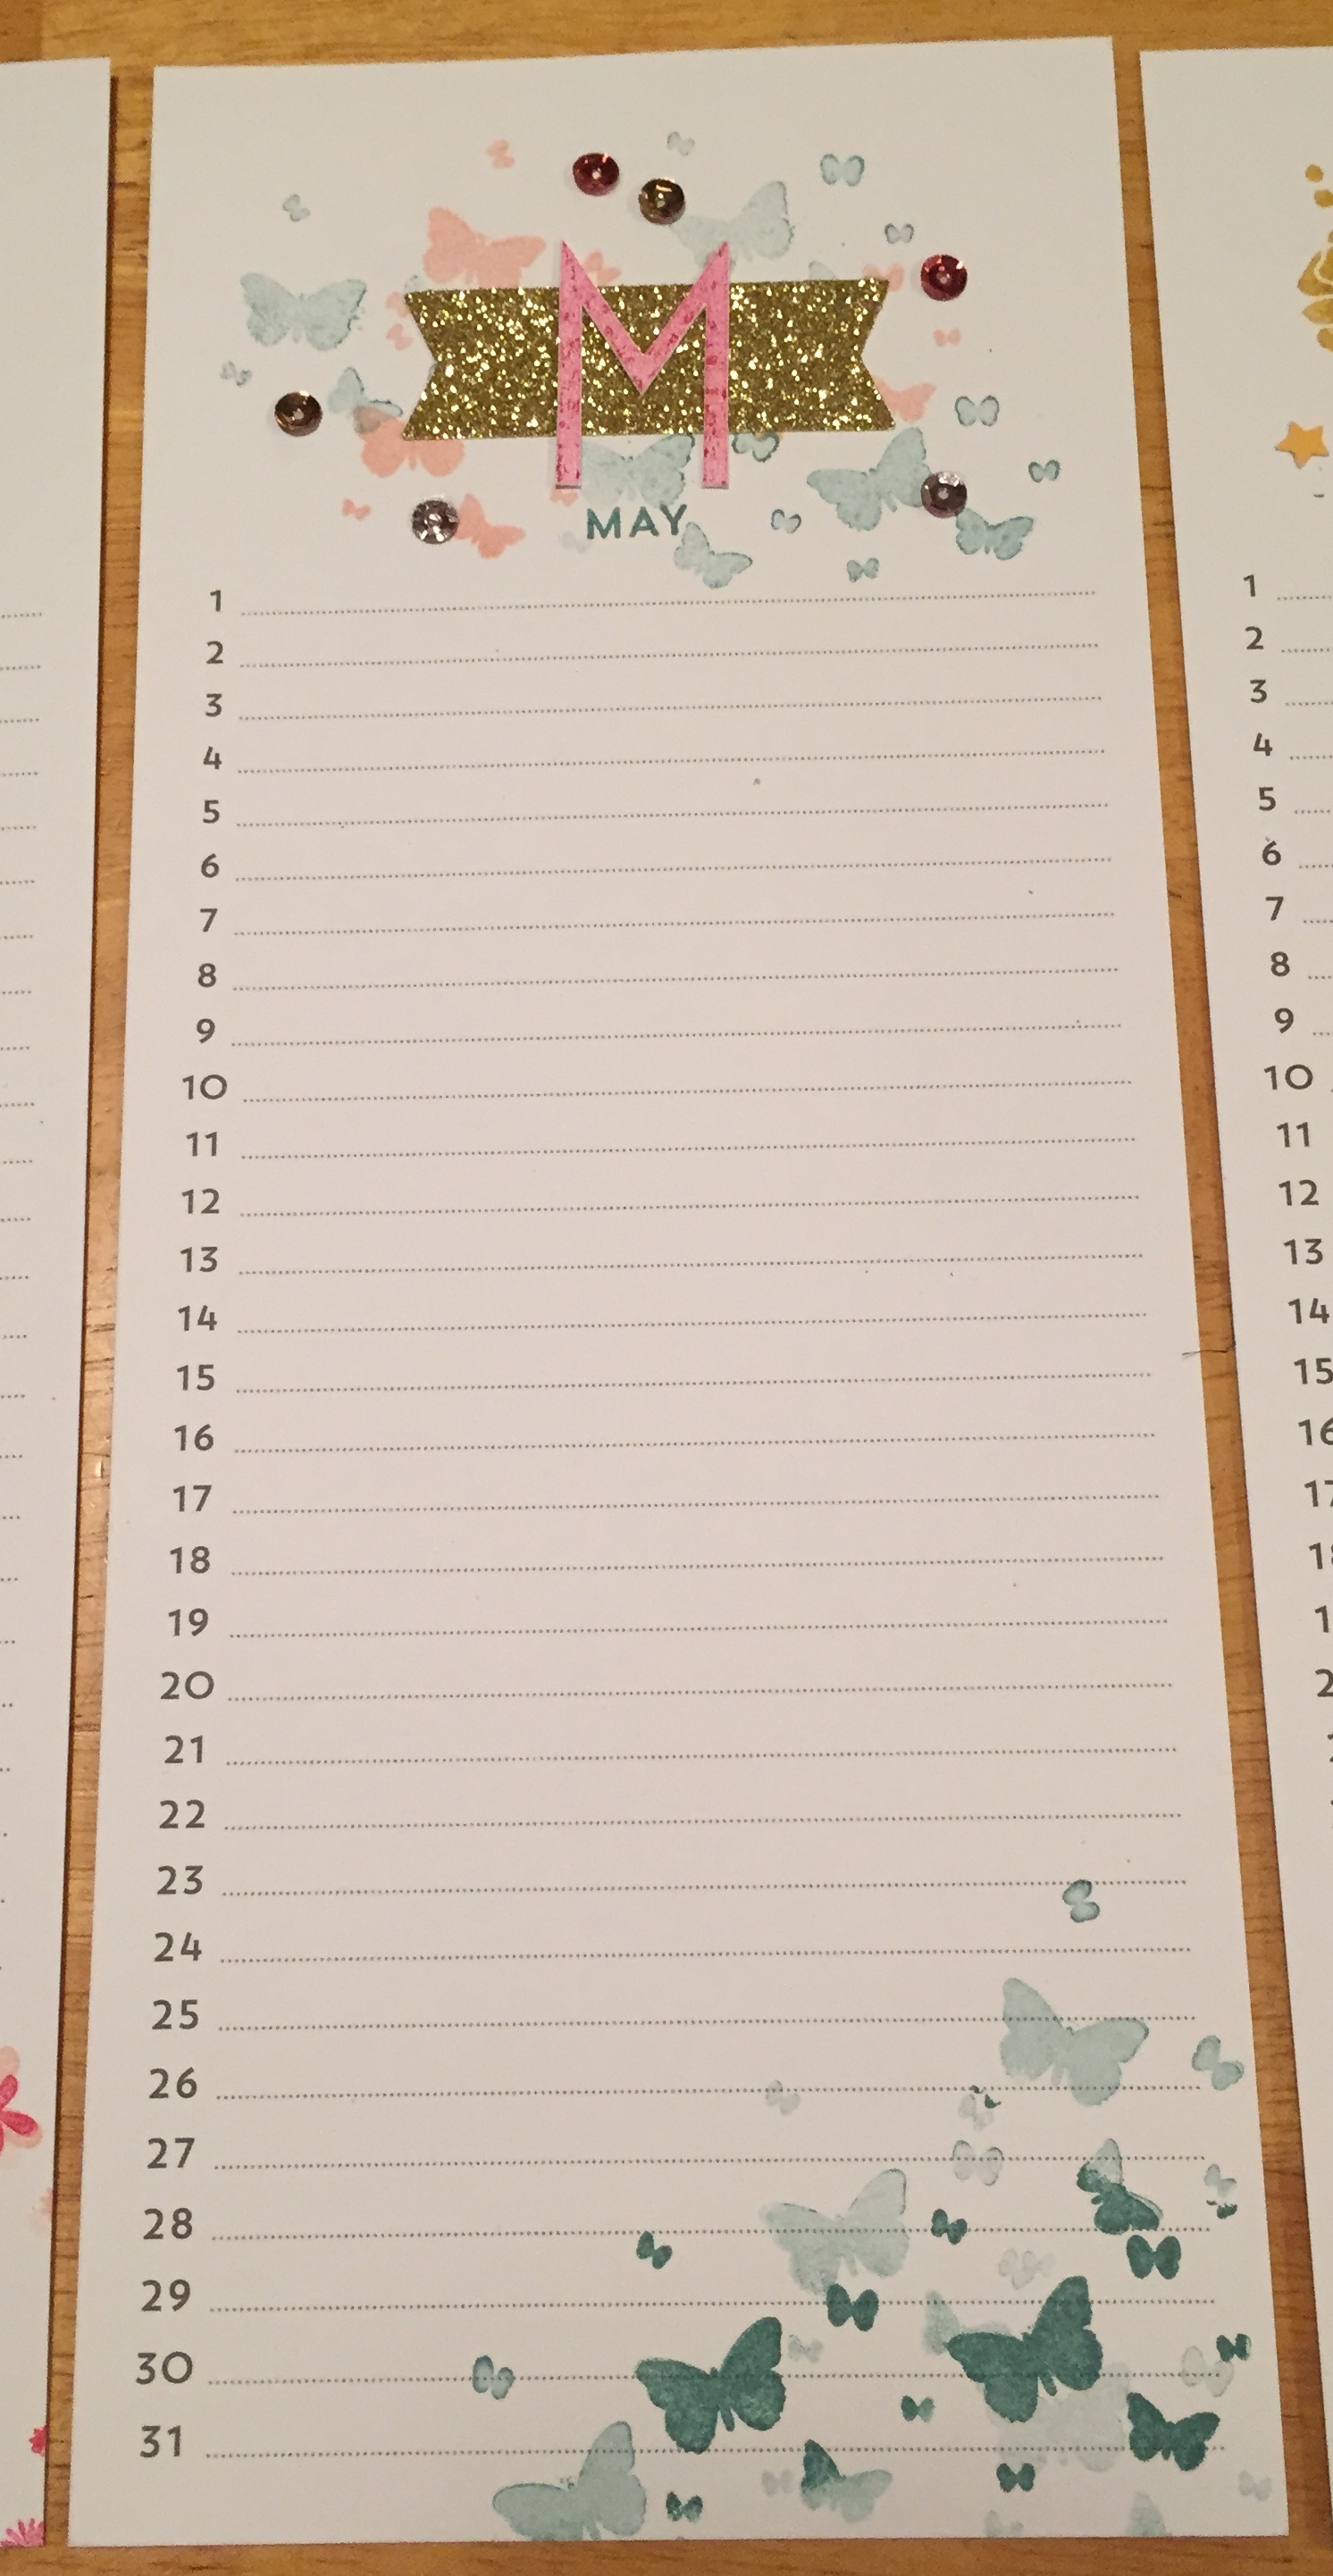
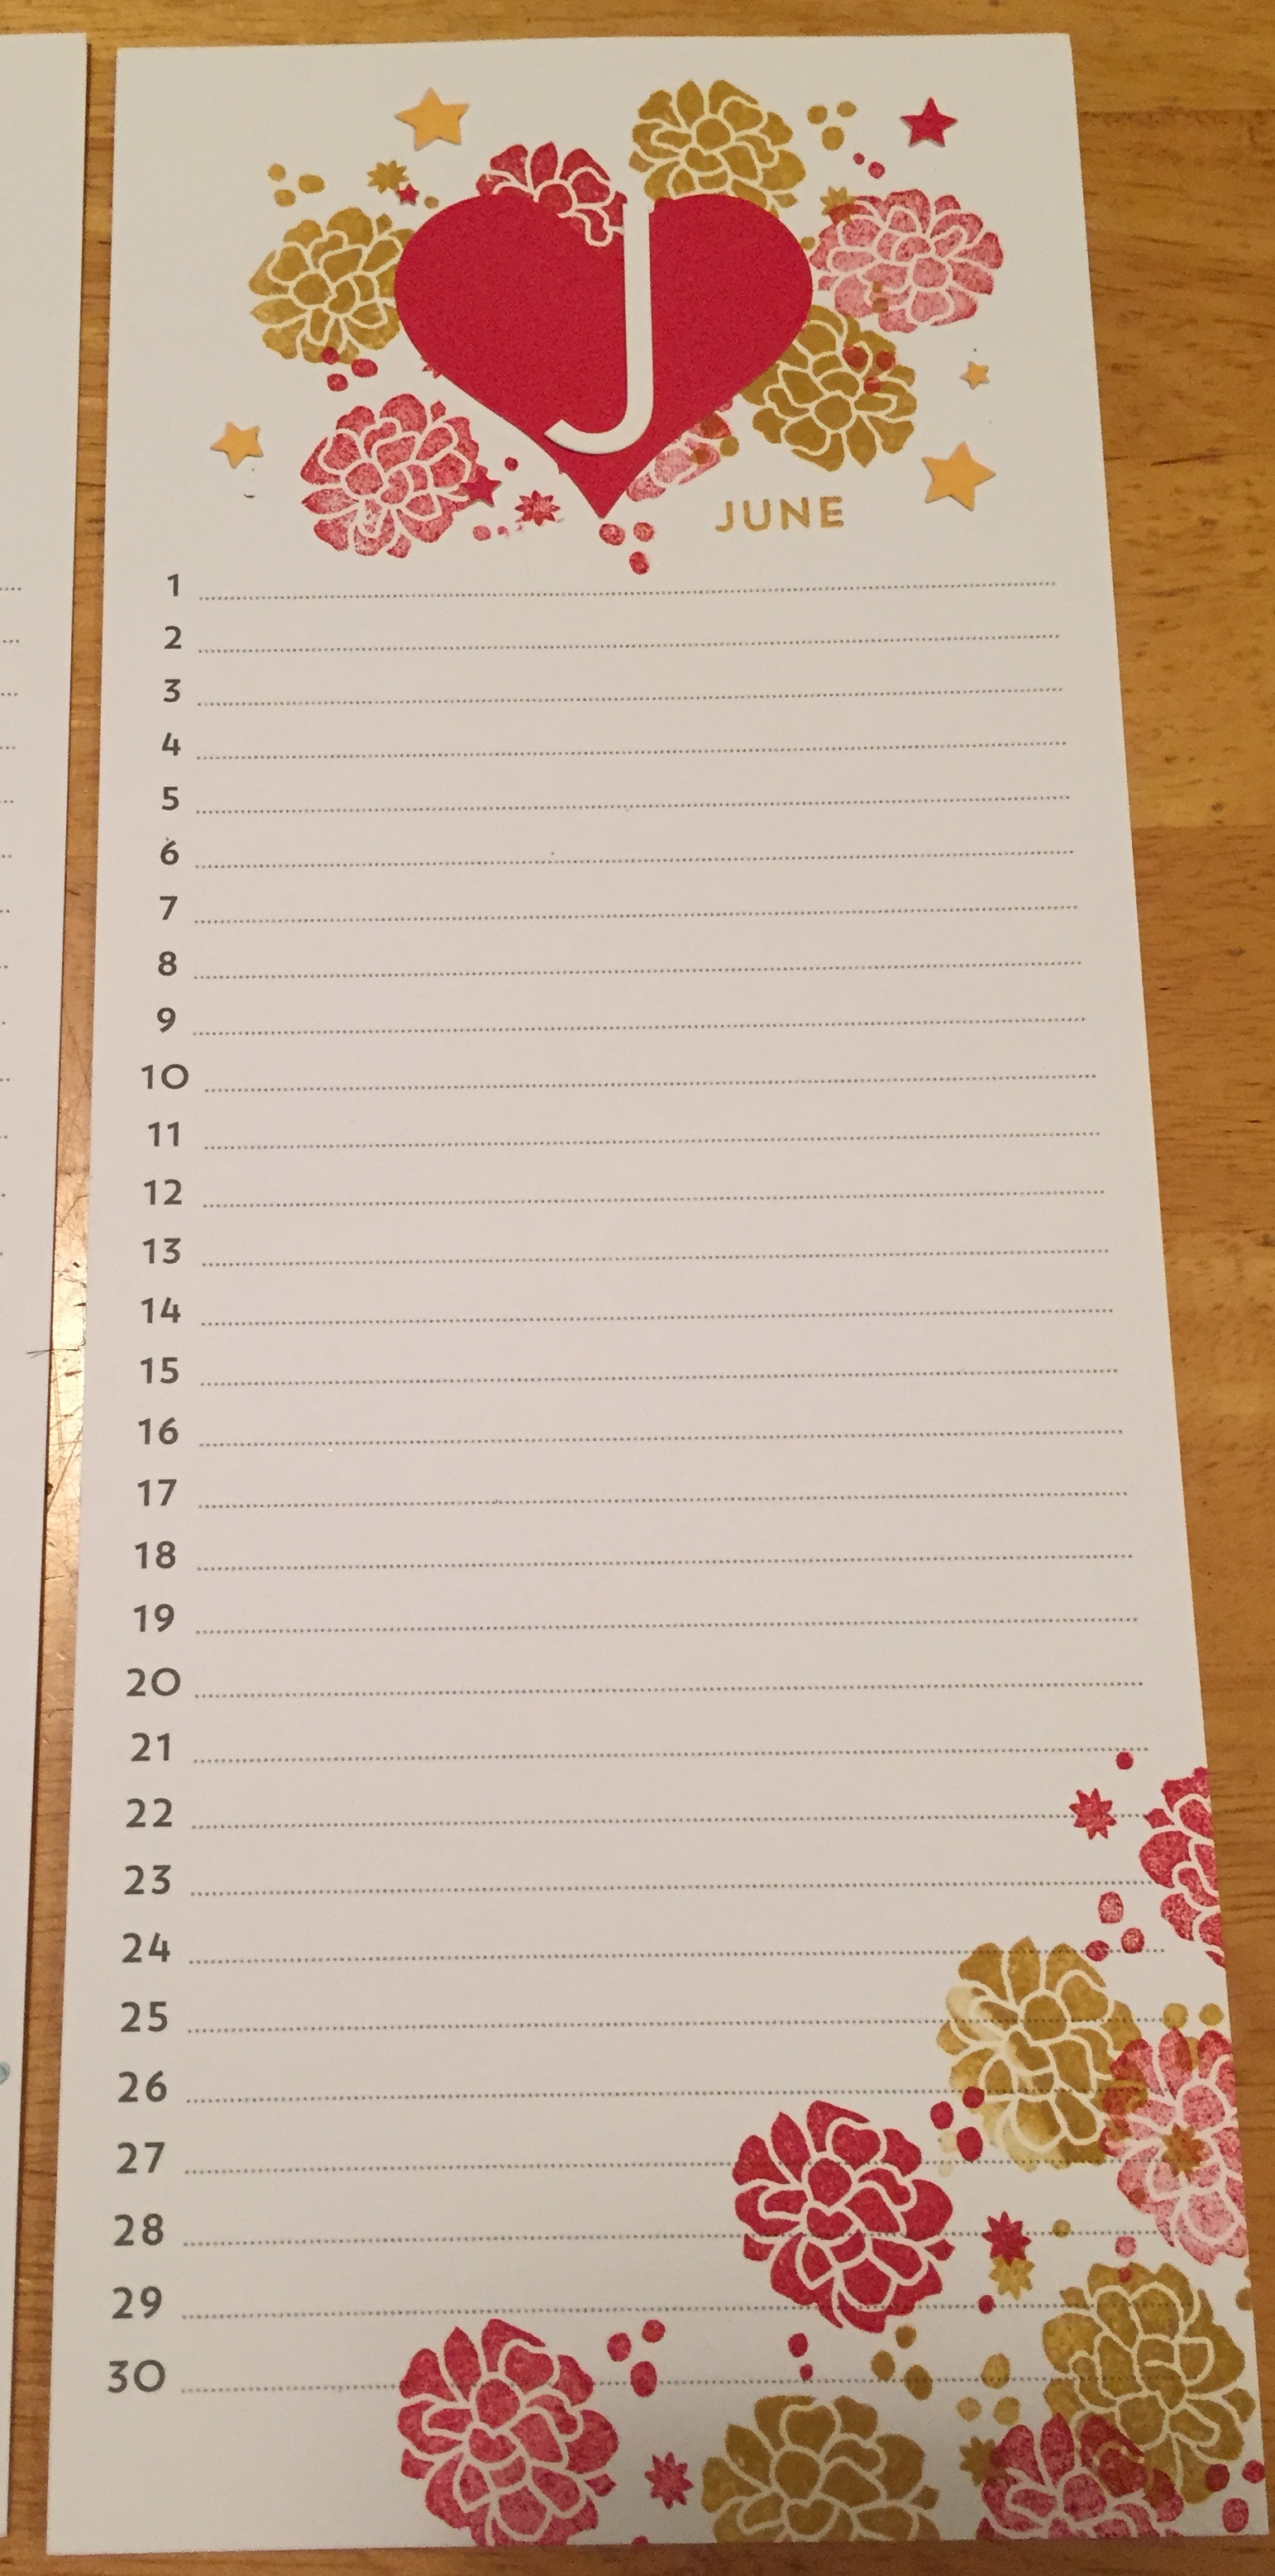
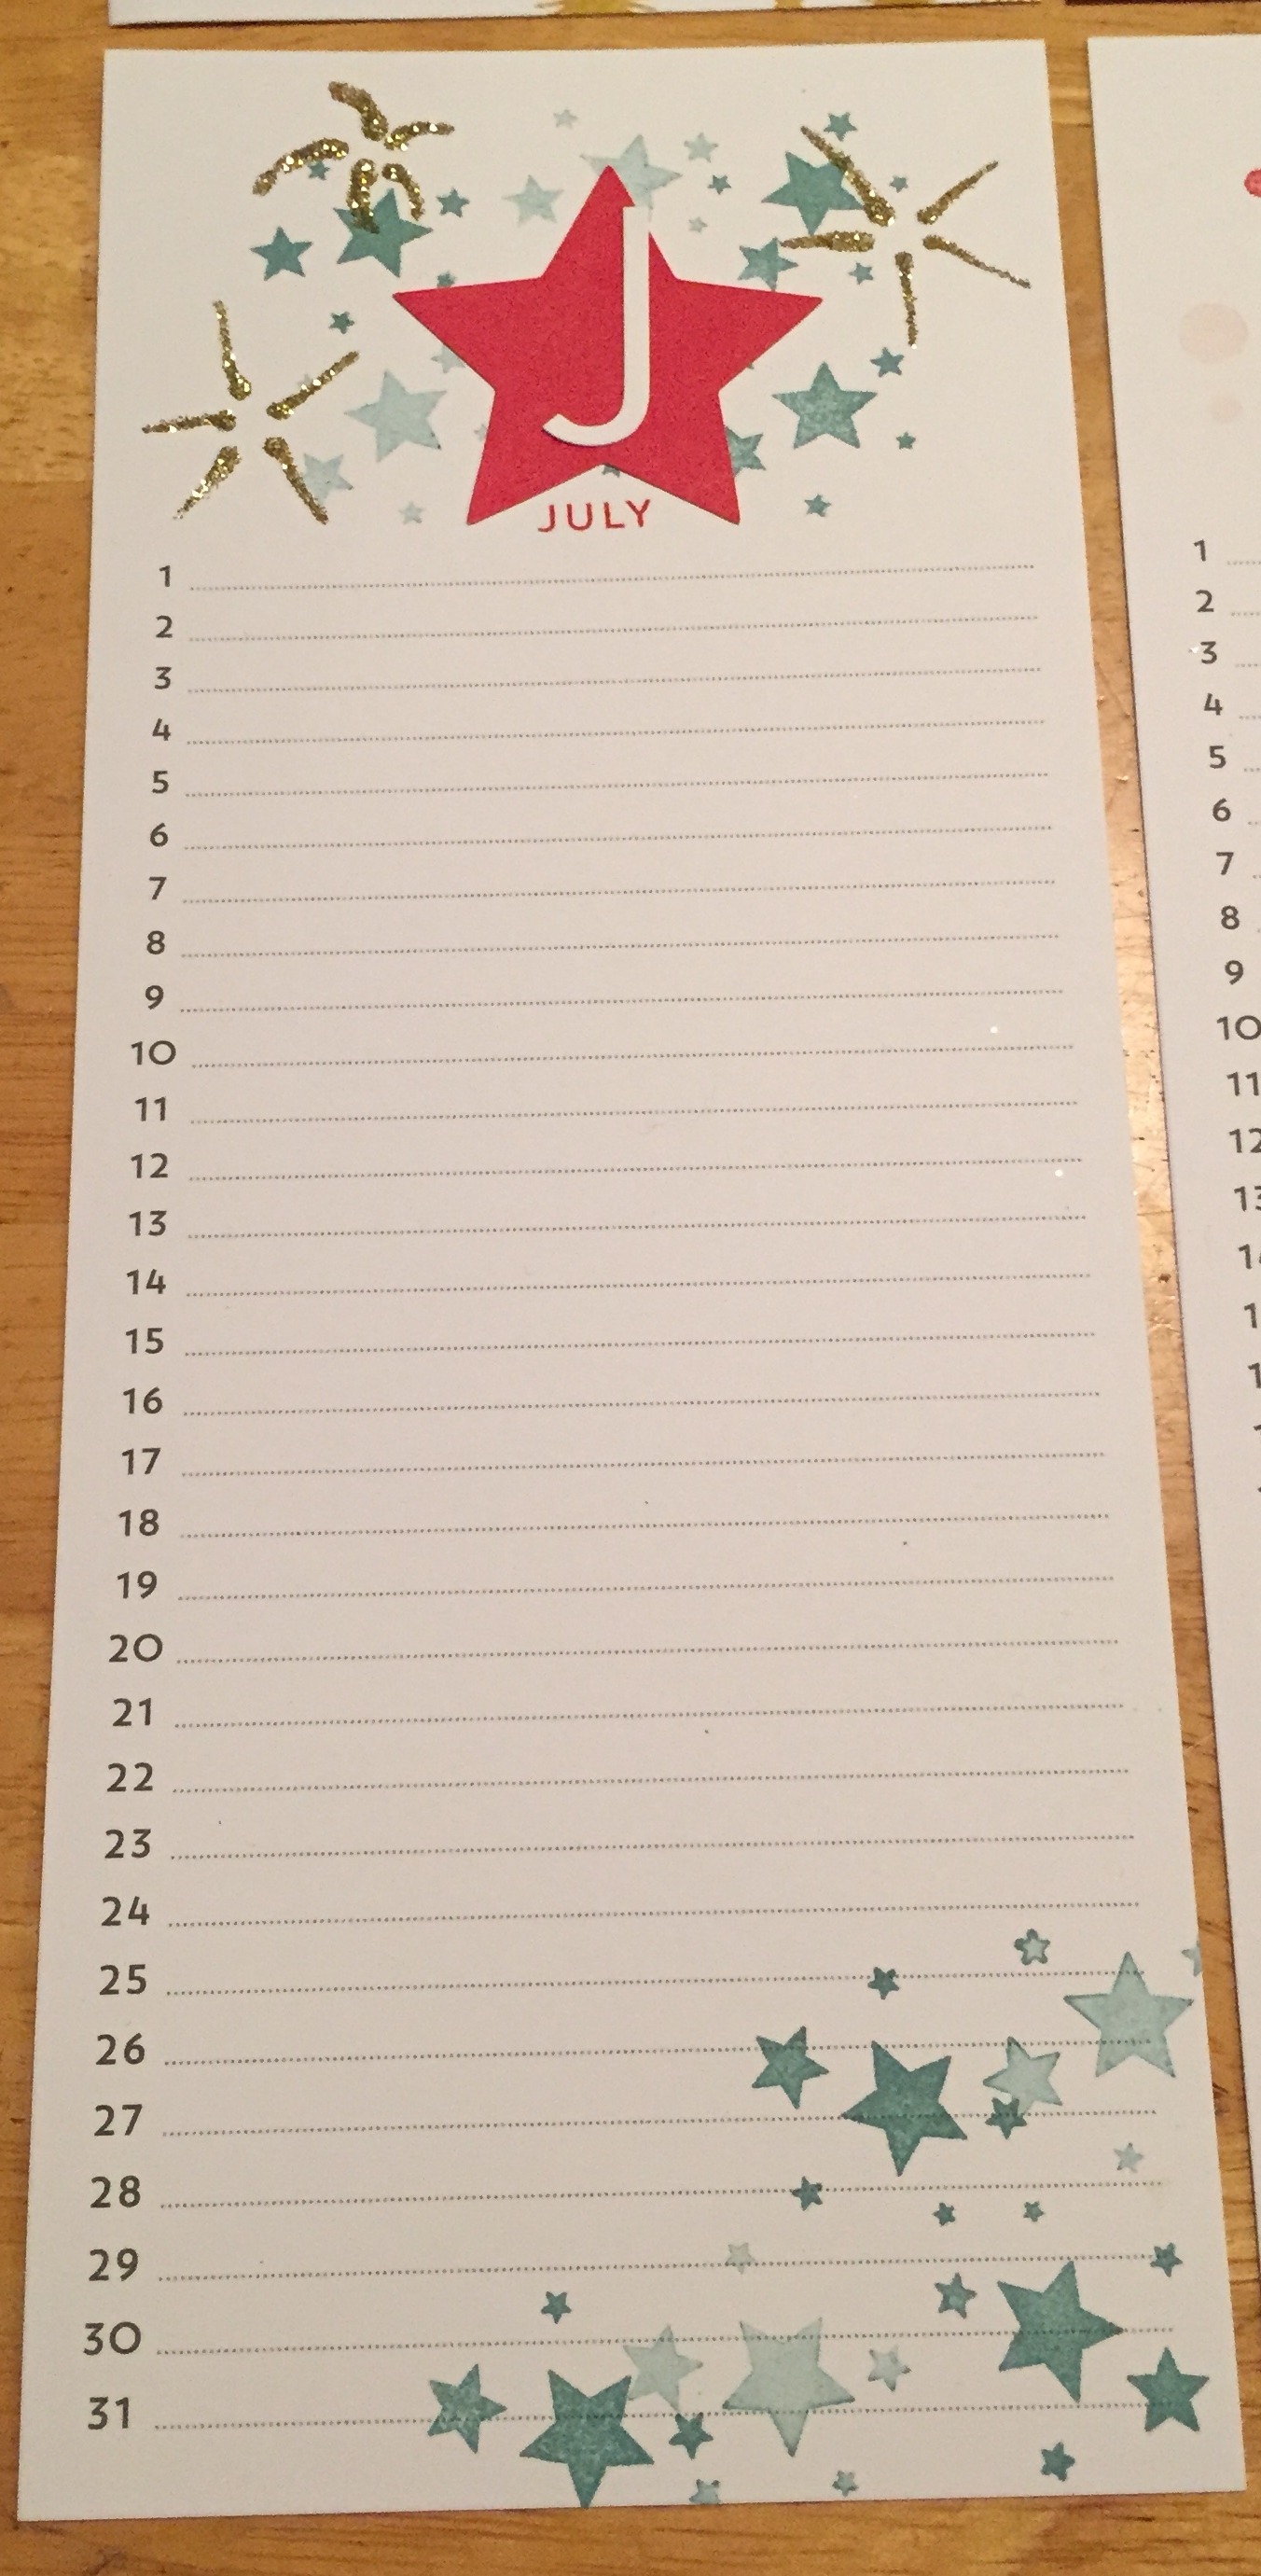
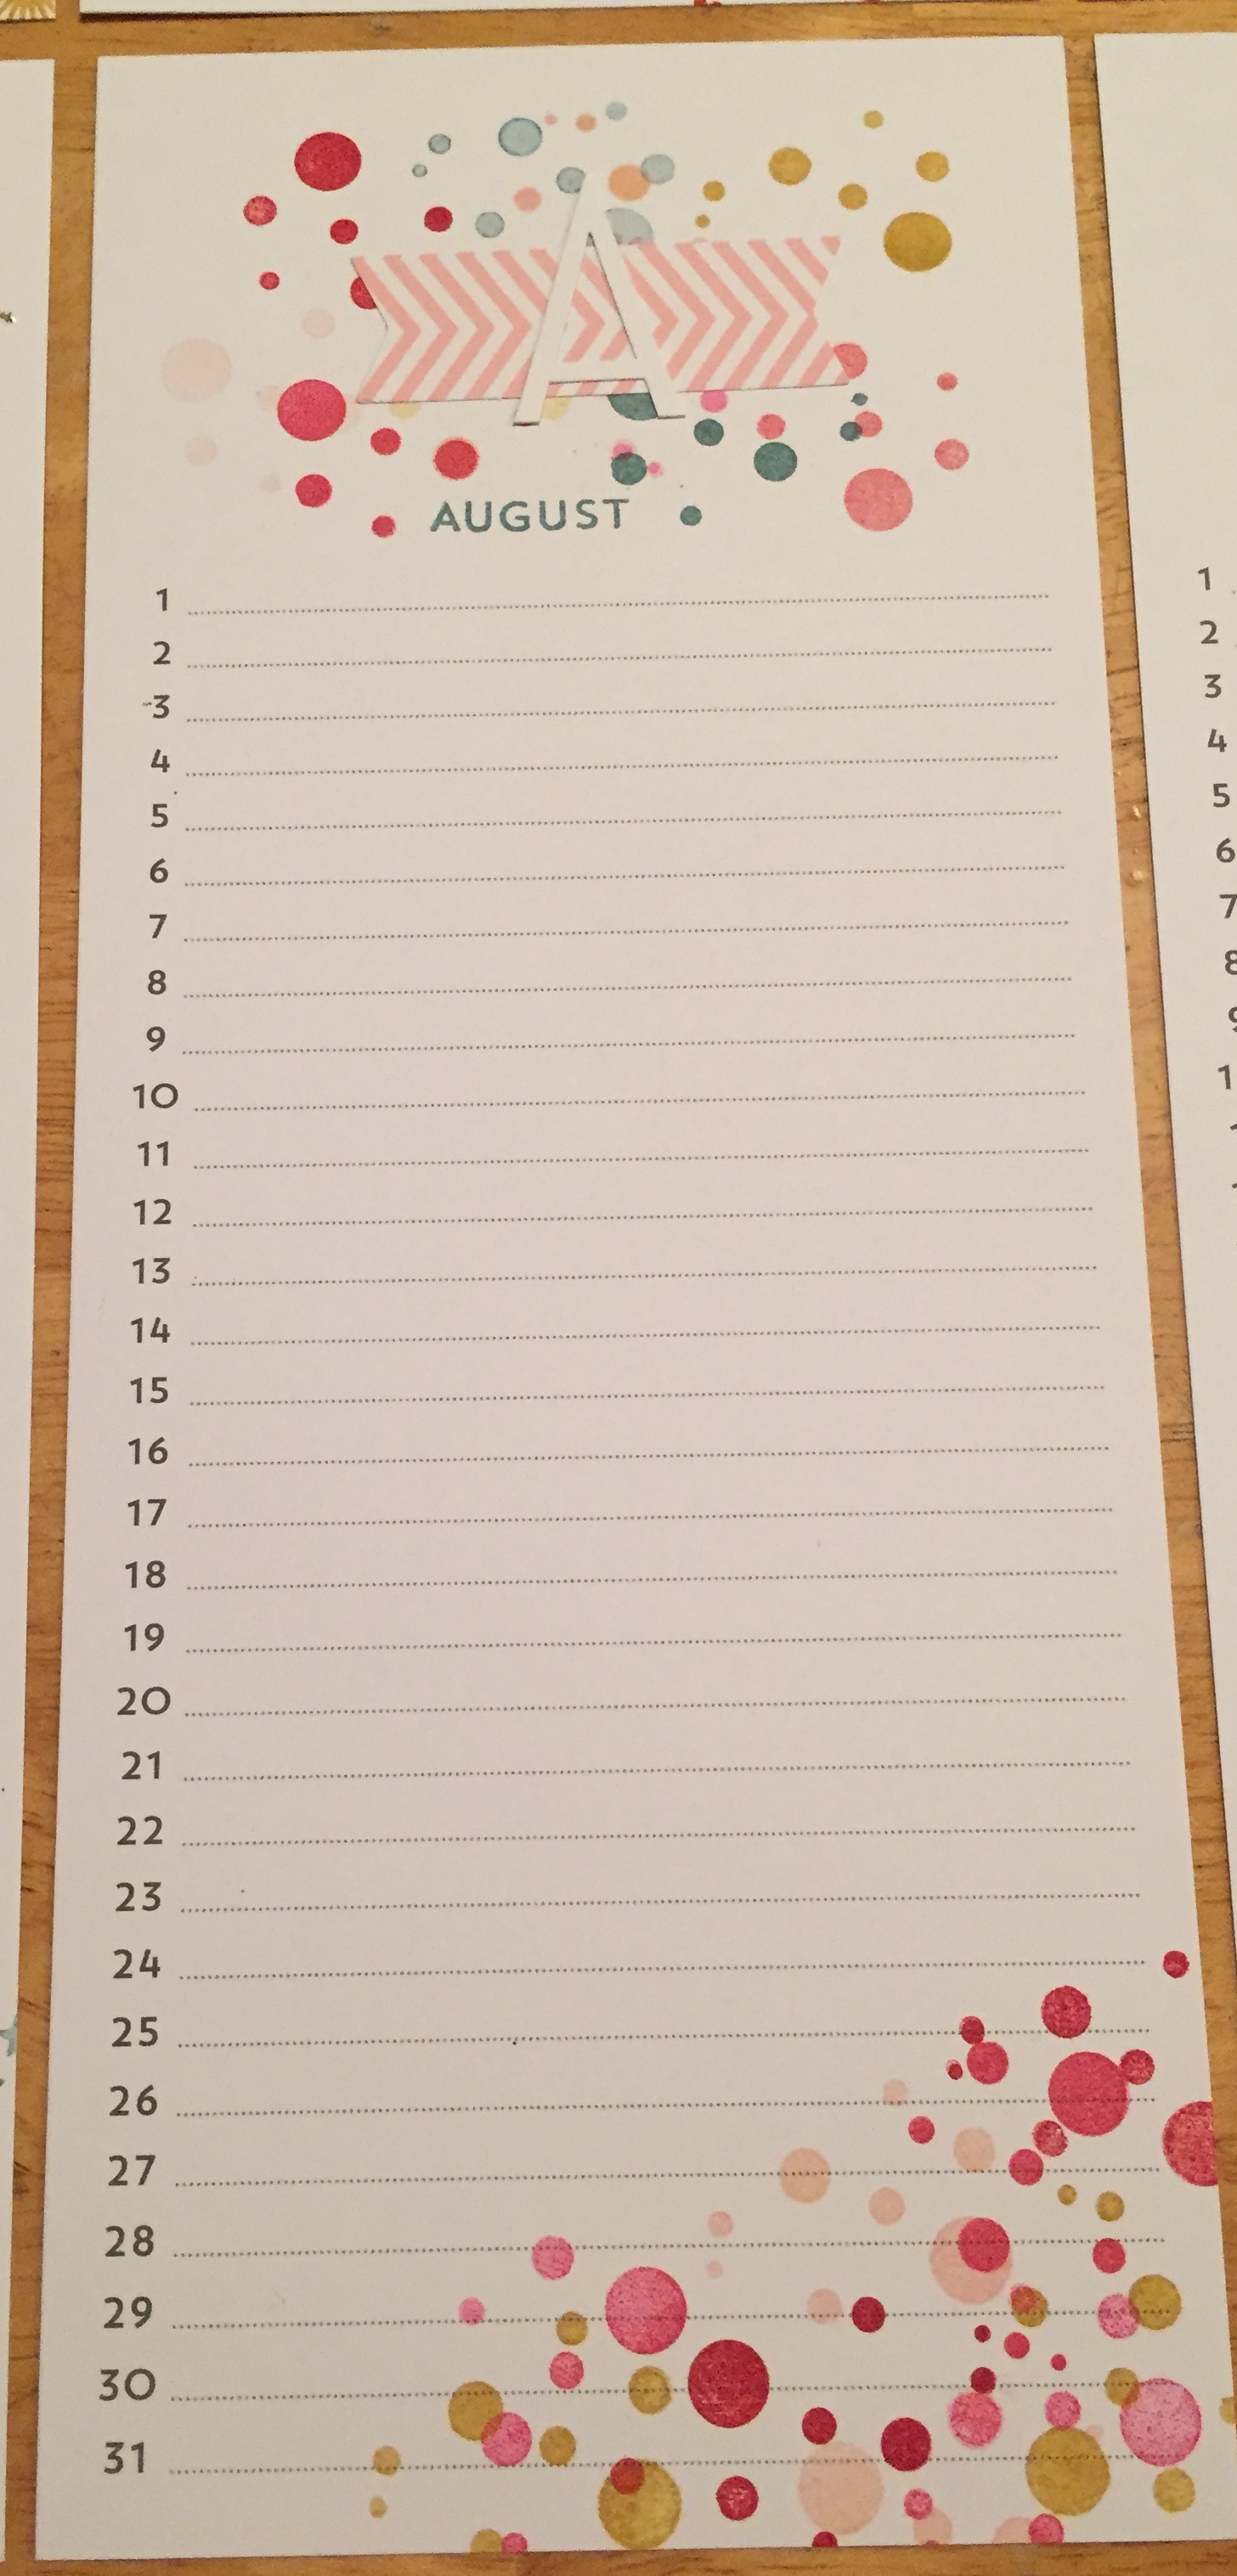
- It’s as easy as 1-2-3:
- stamp a background and month
- add accents and twine
- clip to board
- Stamp background and layer shape and letter.
- Wrap Baker’s Twine around the backing board several times and tie in front.

- Create confetti look by layering background stamp and small stickers.
- Adhere sequins with a drop of Multipurpose Liquid Glue.
- Stamp backgrounds in multiple colors to create dimension.
- Adhere Glimmer Paper with Multipurpose Liquid Glue.
- Place a drop of glue on the card and then cover with glitter.
- Clip Sequin Trim for added sparkle.
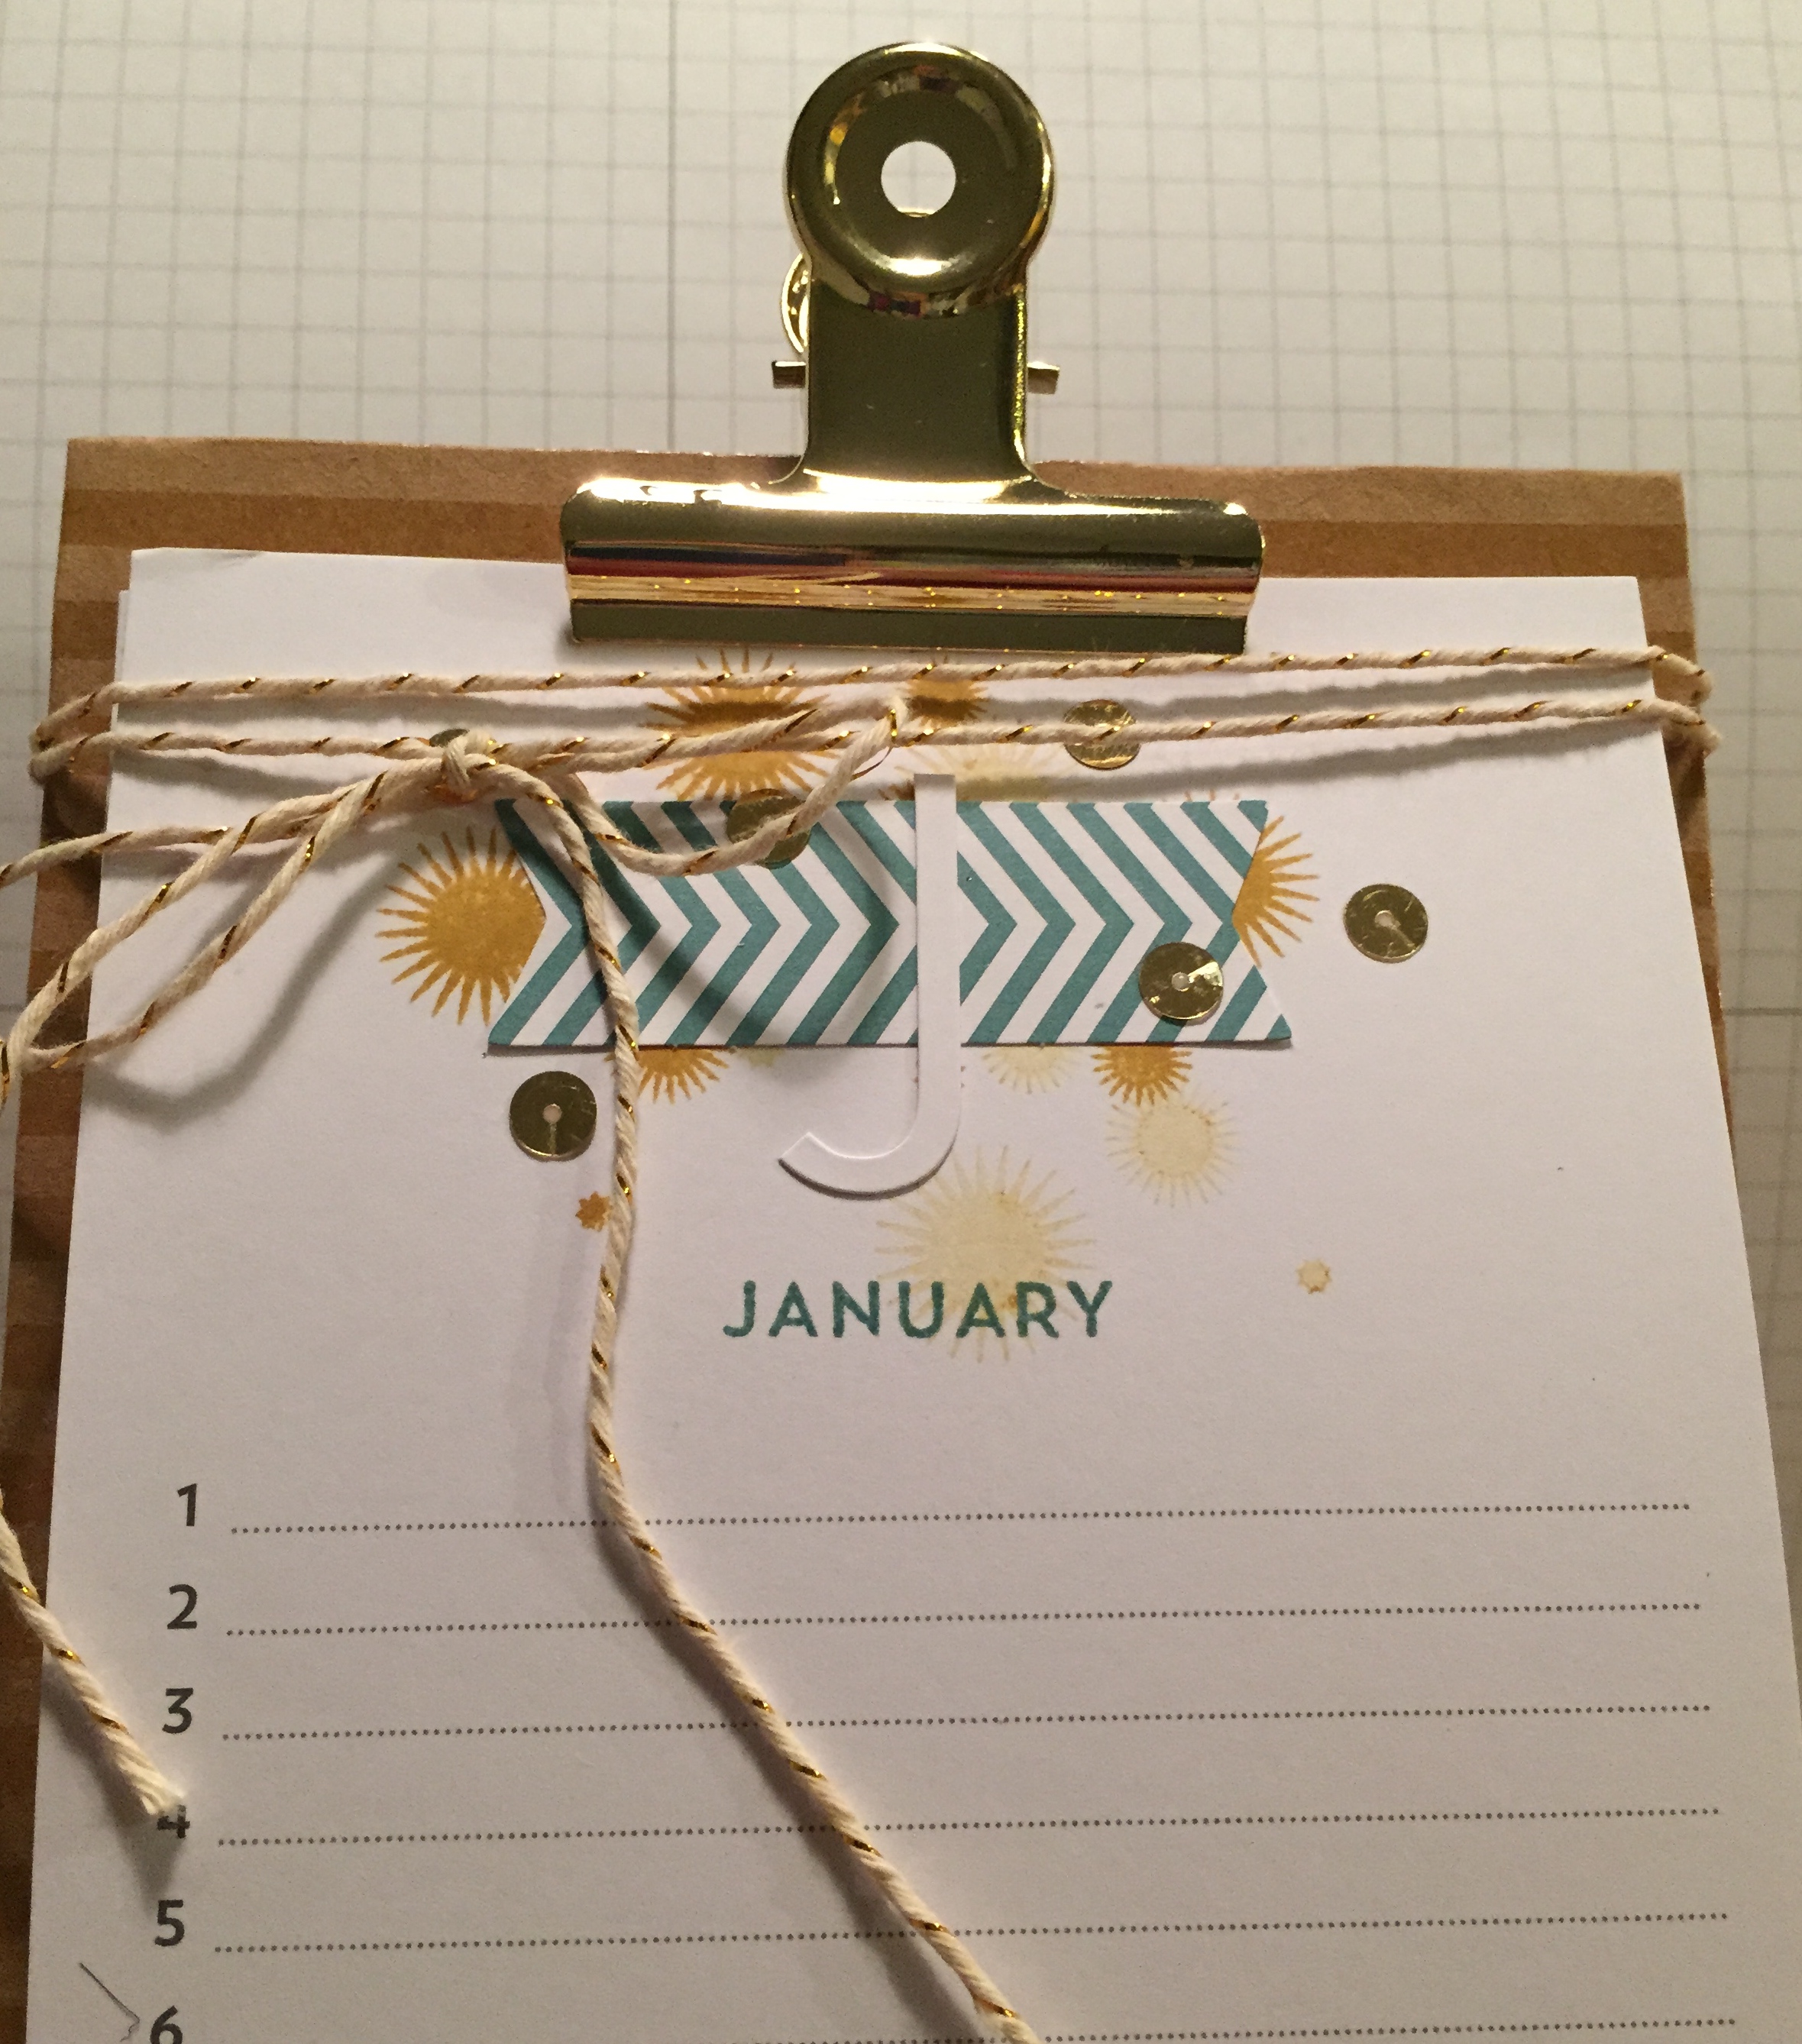
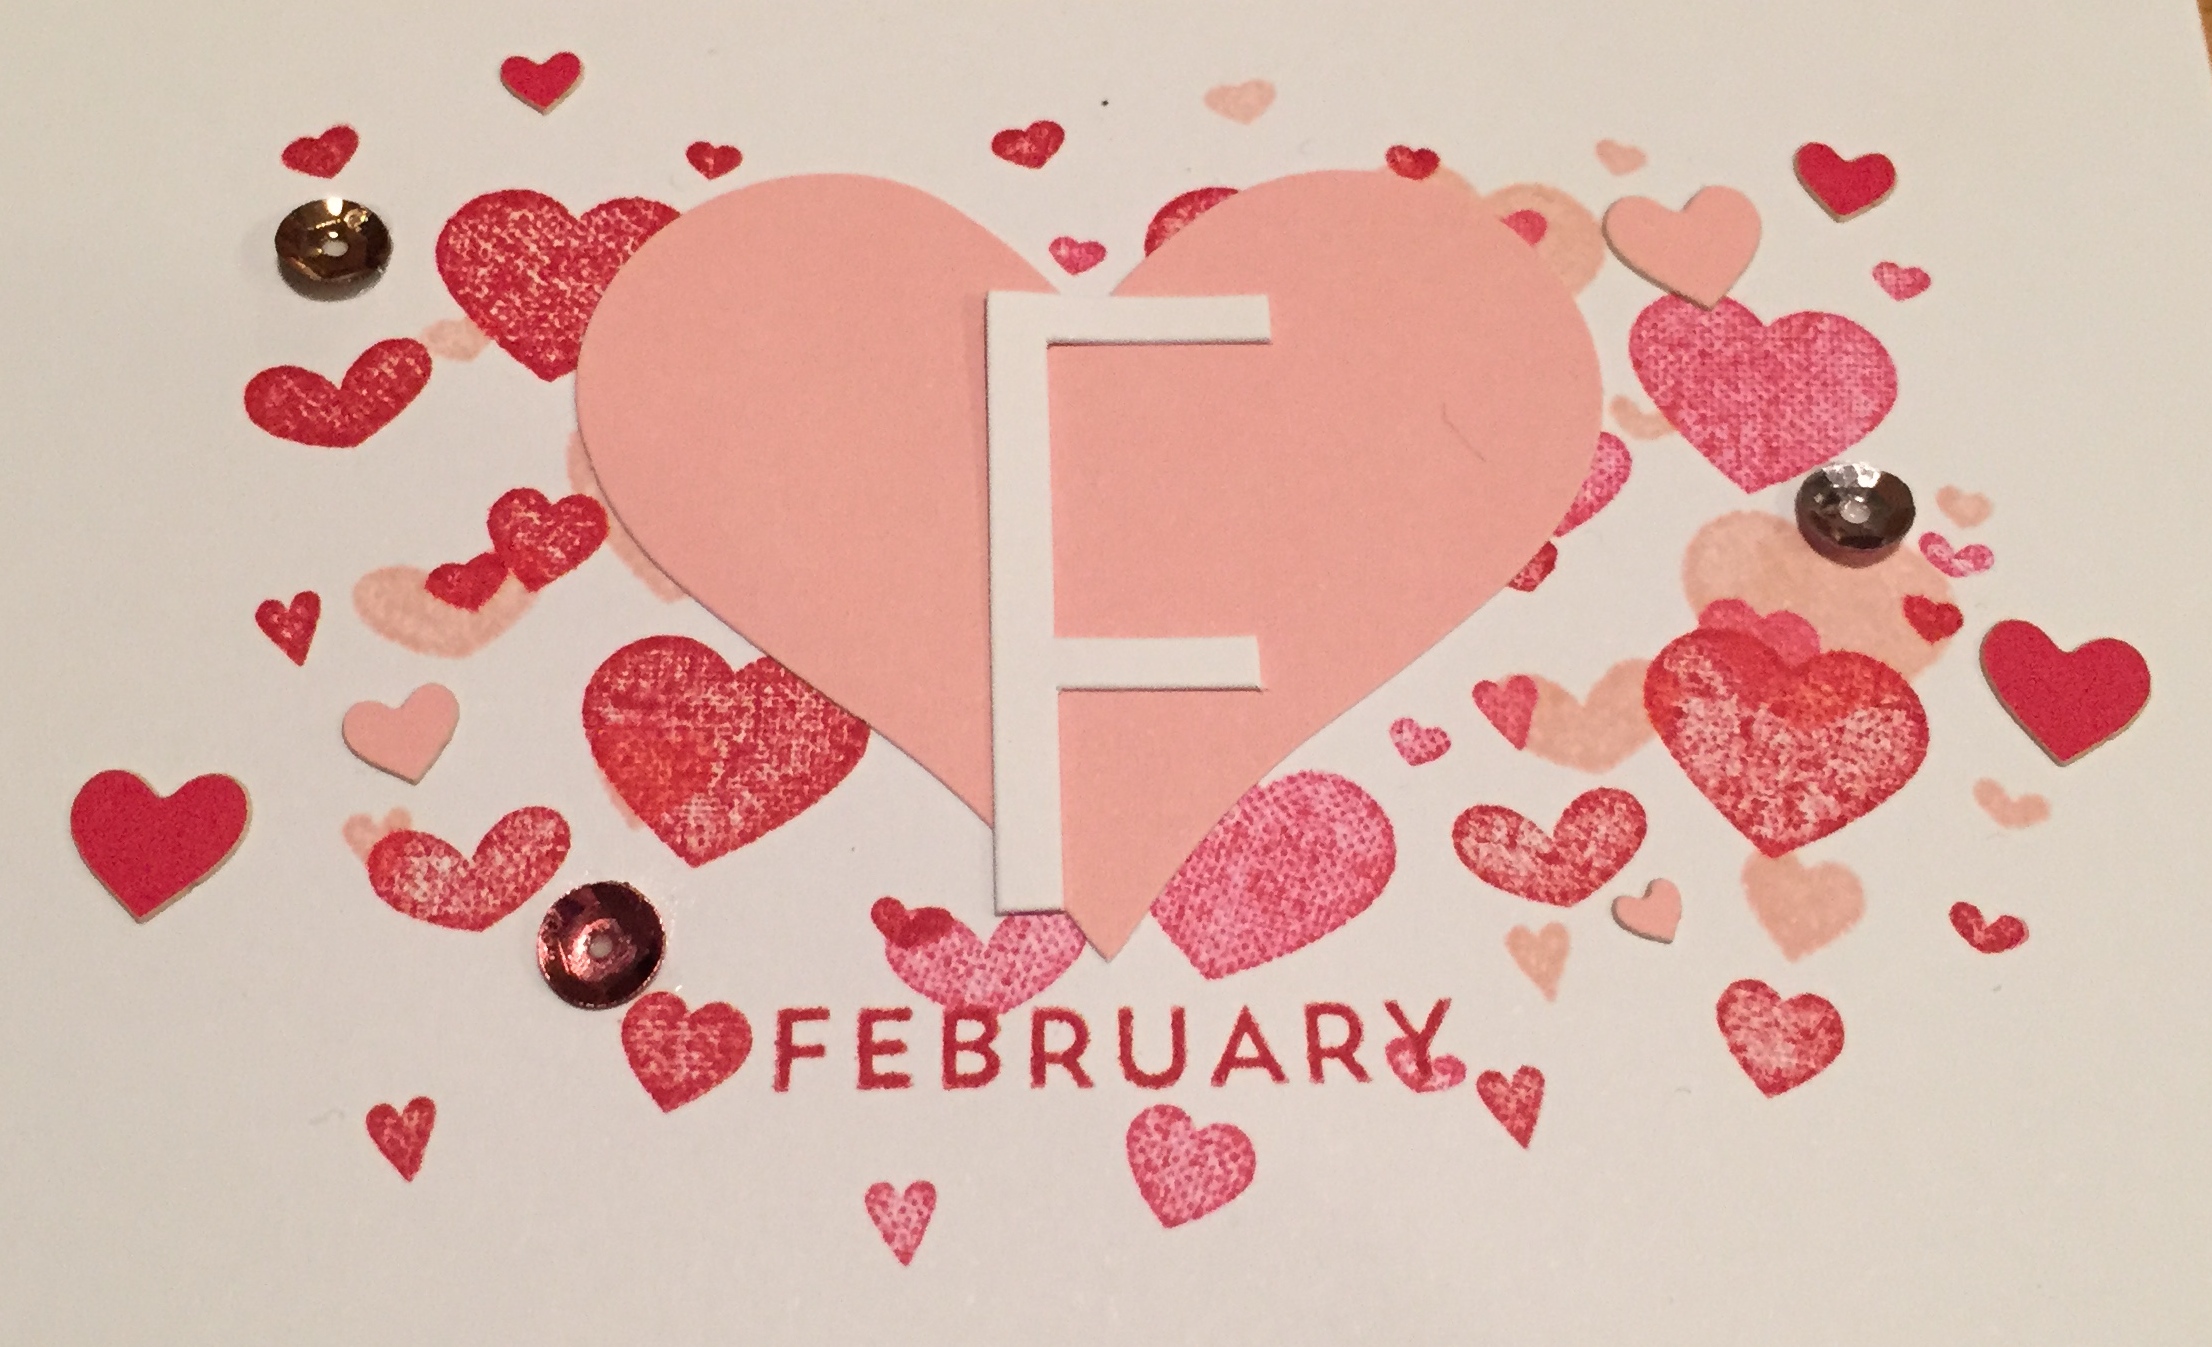
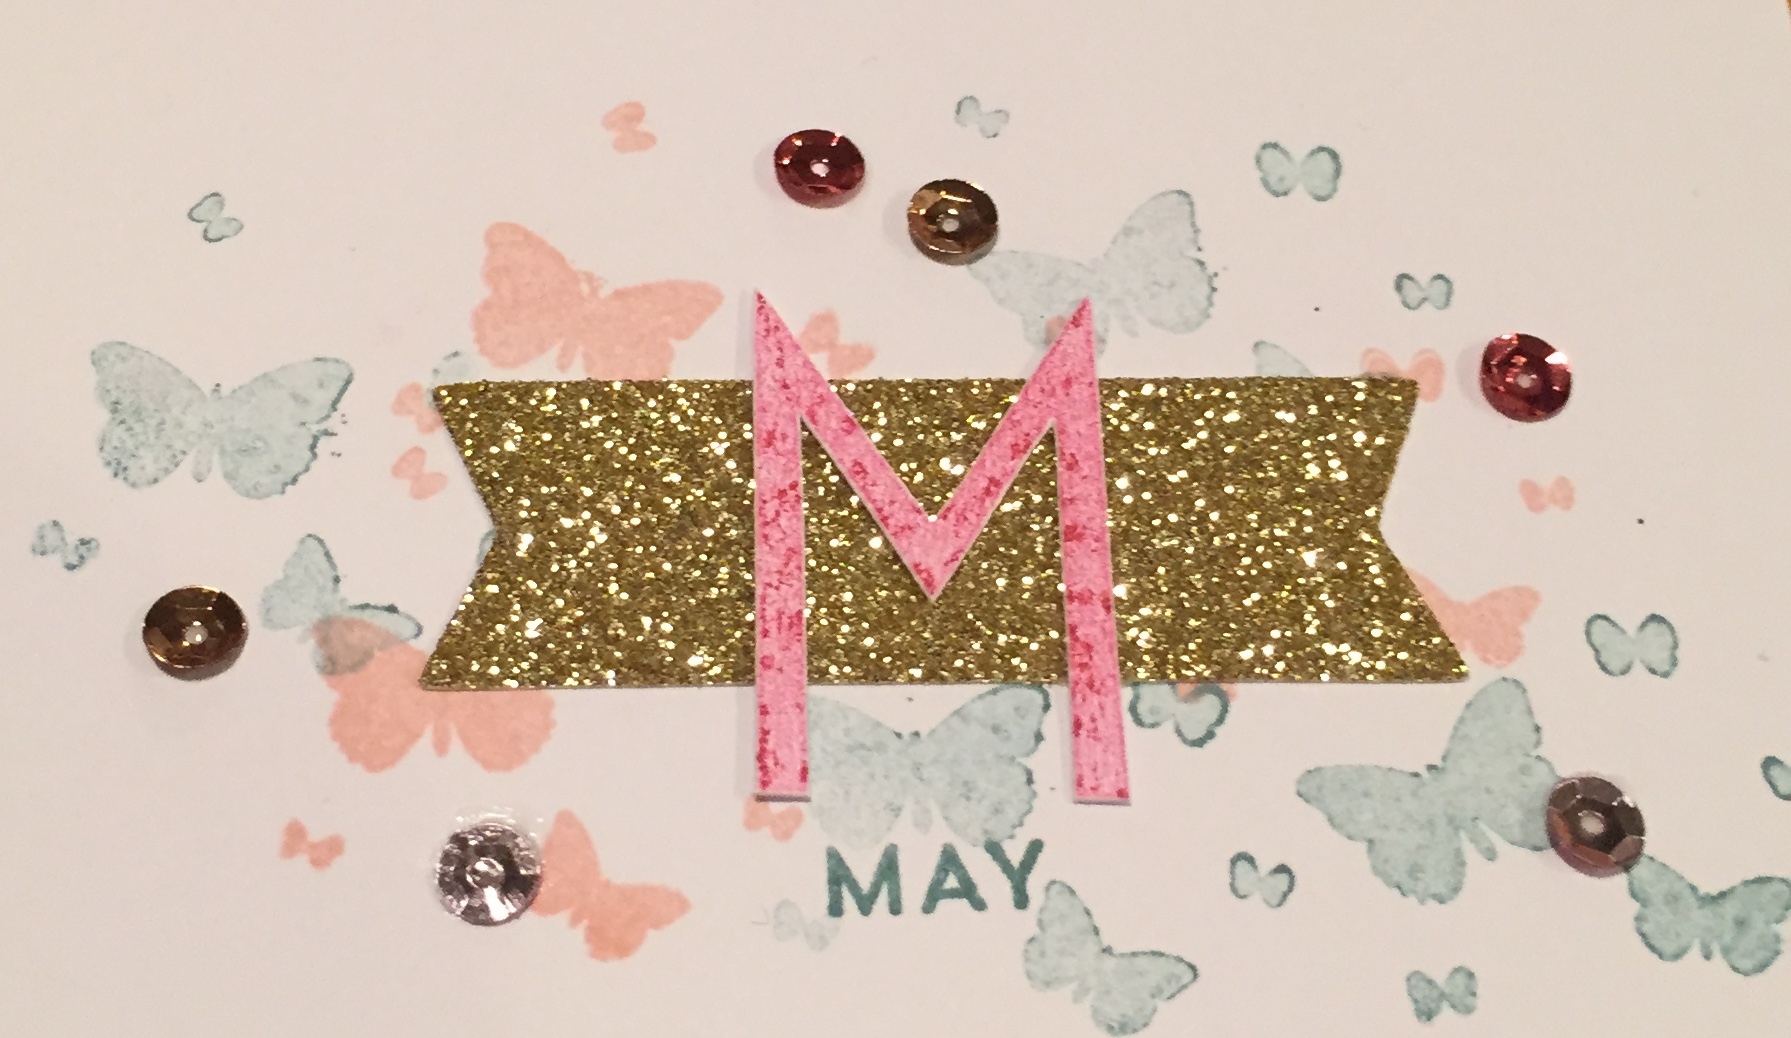
So that’s what they have to say. And it’s all great advice. They also offer pictures of a completed project, but the pictures are in black and white and, again, pretty small. So here is a complete set of pictures of our finished product: (Click on the image to enlarge to full size.)
 |
 |
 |
 |
 |
 |
 |
 |
 |
 |
 |
 |
See you soon!

 Shop with Rach Shop with Rach |
 Shop with Sarah Shop with Sarah |